Sunday, 9 March 2025

2nd game at Small Unit Tactics IV - The Red Spy is still determined to capture the briefcase!

 I see the briefcase is safe. Tell me, did you happen to kill a red spy on the way here? No? Then we still have a problem.

The Russians are determined to recapture the briefcase!

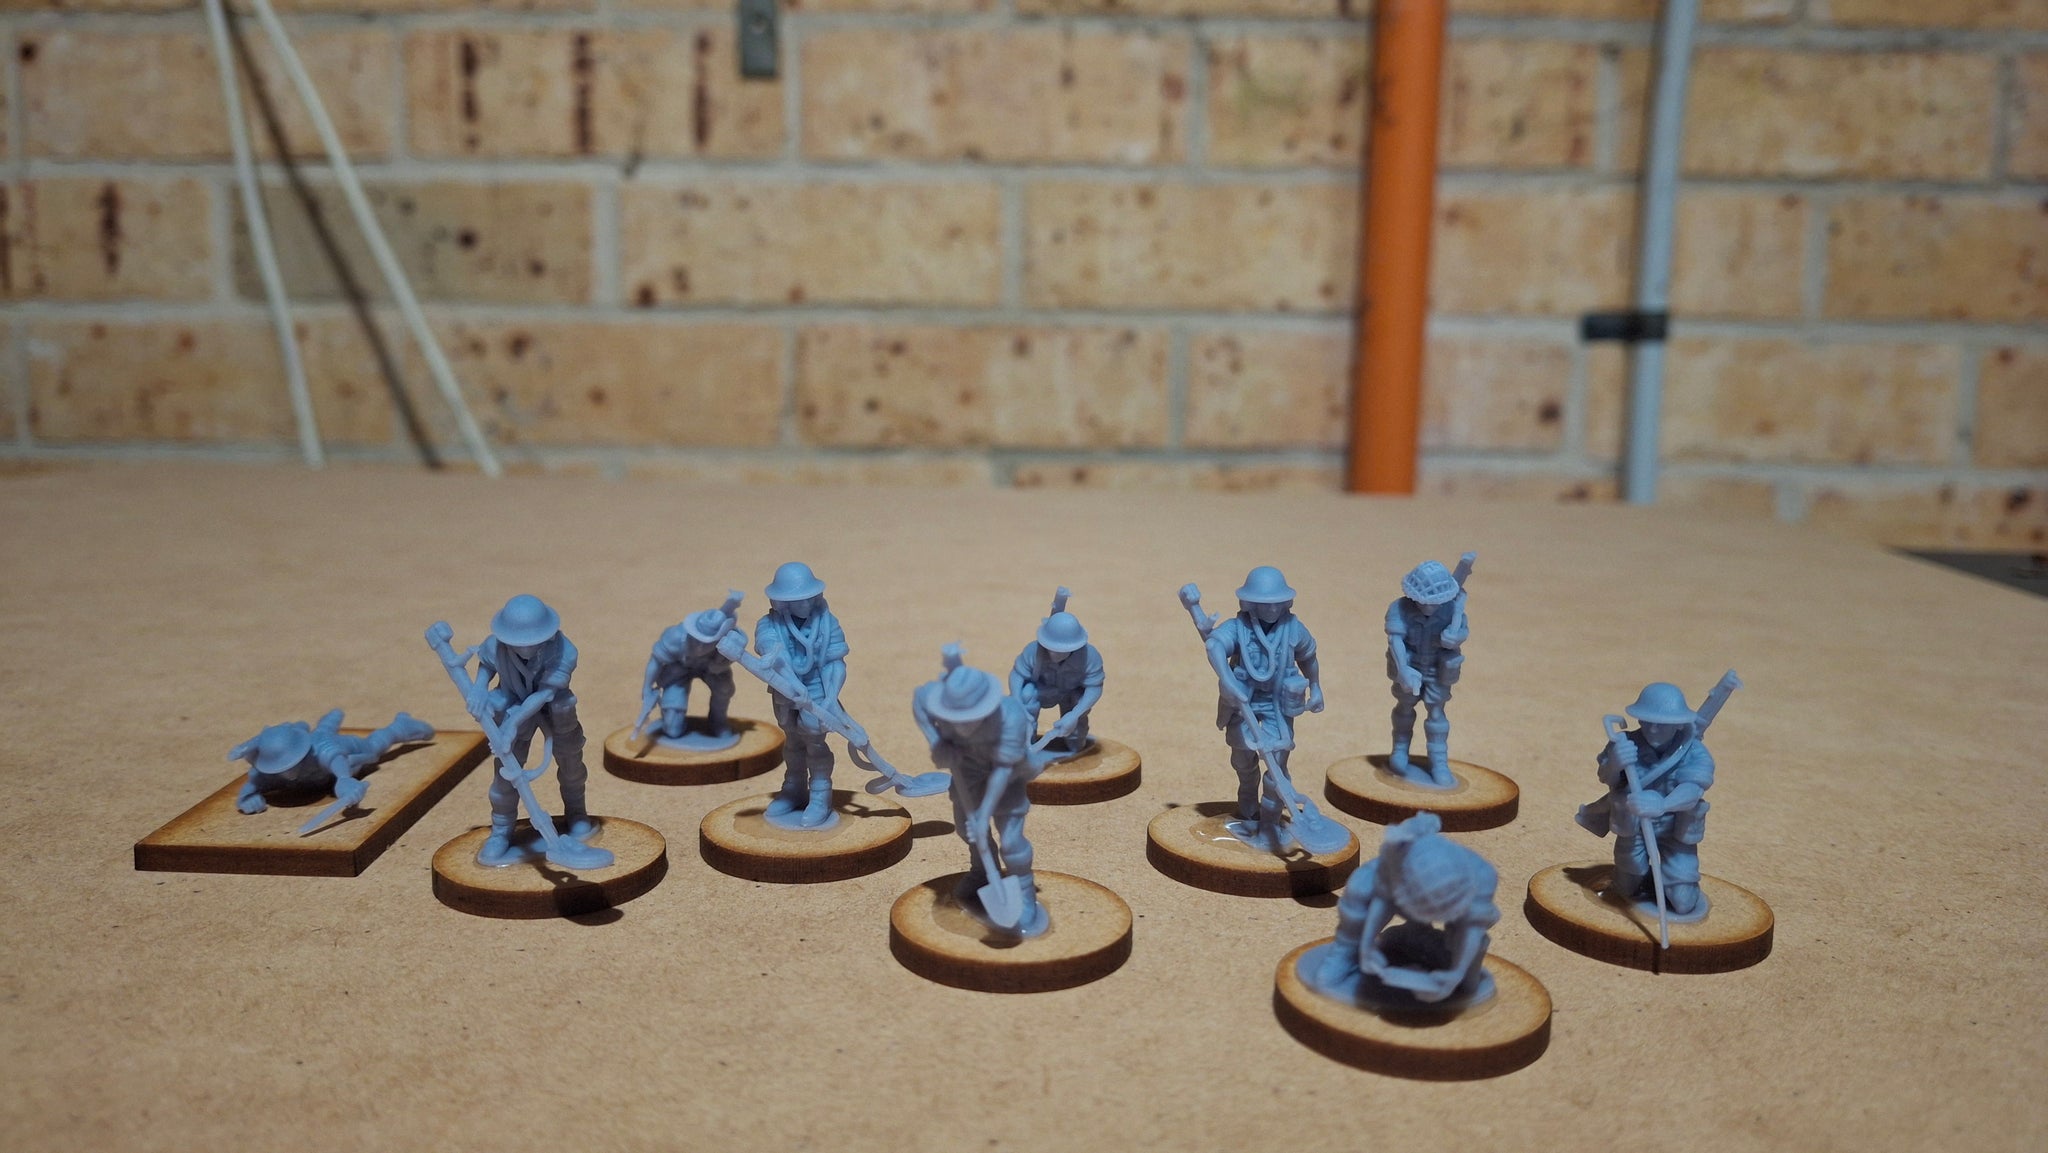
The 2nd game at Small Unit Tactics IV was to capture 3 para-dropped objectives. They would show up on turn 3, with one the in middle and the other two in a random line direction across the battlefield. The armies were only 850 points in size, to allow 3 games in a single day at The Gaming Arena in Melbourne. The table was again excellent, I want to buy one. My first game was a loss covered here, and my army list here. My infantry is is from the Bardia range from Slaves2Gaming, my tanks from Warlord Games.

I was playing the Russians 1943ish and the terrain looked to be in the Soviet Union. They had one Su-76 (with AT shell), a light tank with autocannon (a mirror to my VIc Light tank), two rifle squad's, an inexperienced light mortar, two MMG's and two assault SMG squads in trucks

The battlefield looking from my left flank, after my first wave has run forward. Russian MMG teams are in the fields and 2 rifle squads in the centre

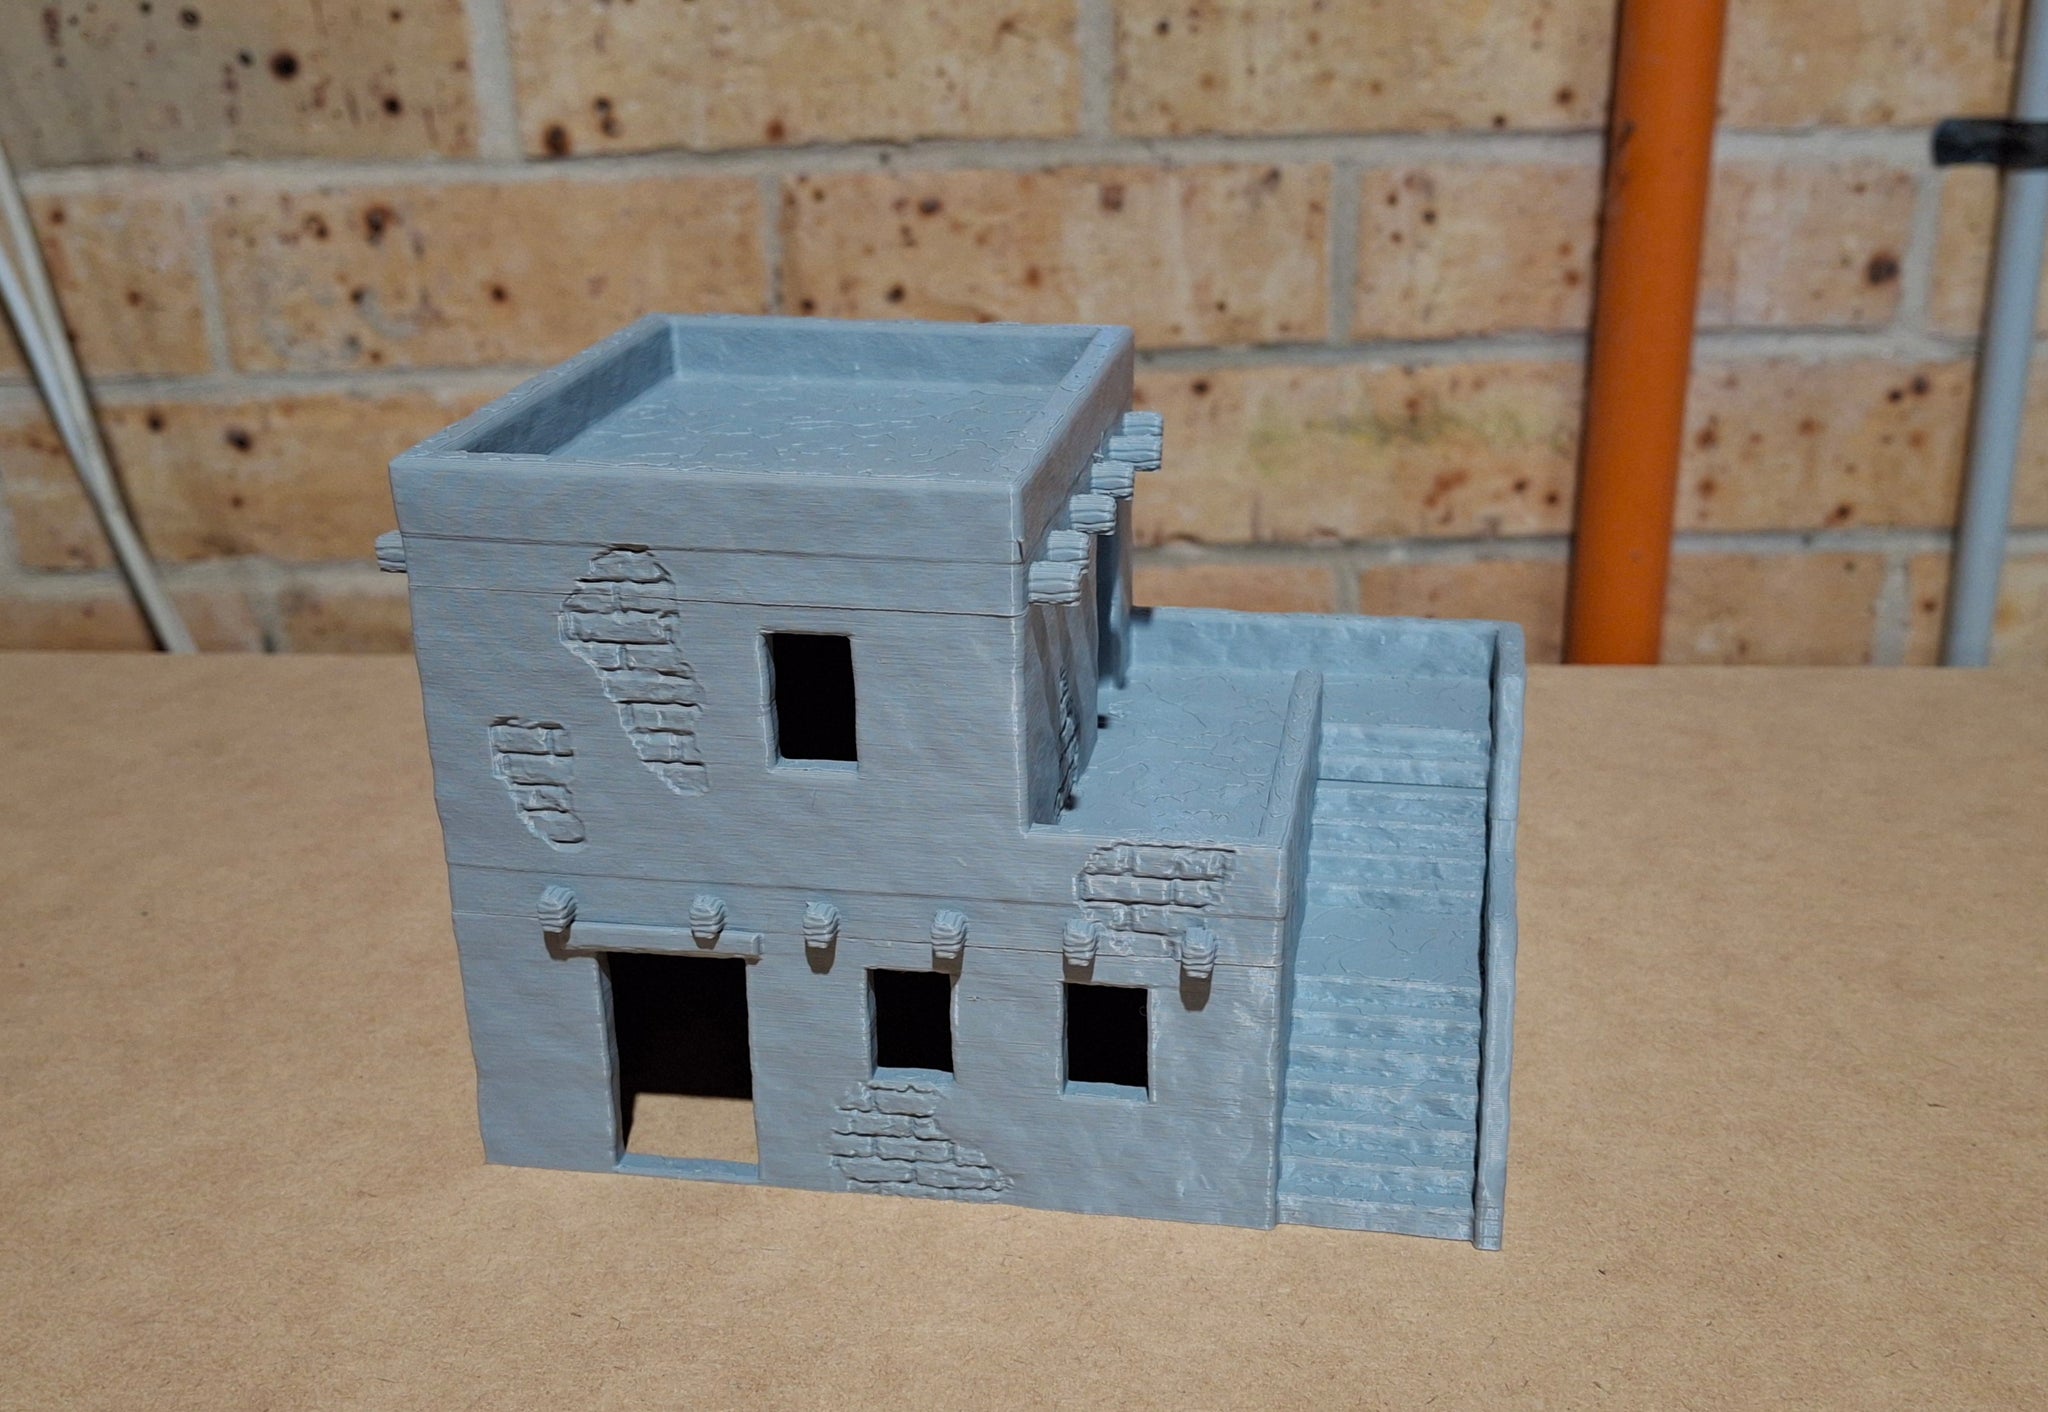
I won the dice off and decided to attack from the side that had greater cover. I could see a ruined building and hedges that would provide good cover to take the first objective when it landed in the centre, and some hills I could use for cover for my tanks. 

I deployed my two rifle squads in the centre, with one Matty in support, and one on the far right flank, as I hoped to use both hills to their front as hard cover in a hull down position. I was worried about my left flank, and thought I would probably need to bring my light tank on there. I was confident I could take the first objective when it landed, and would need my light tank to possibly get cover for the second. If I could take 2 out of the 3, I win. 

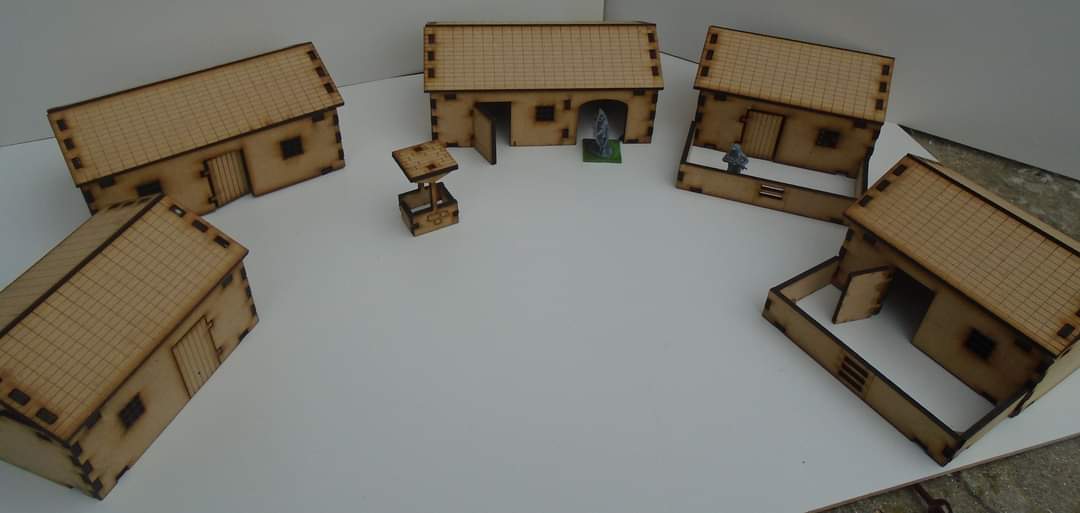
The Russians deployed one Rifle squad behind the building and another in the forest, light mortars and MMG's in the fields at the back and a platoon commander behind the forest. The MMG's had good fields of fire, but I think they were too static for battles that needed you to move to objectives. I knew he had 2 trucks full of SMG's ready to run in from the flanks, and his tanks from reserve. 

What I SHOULD have done is put one tank on either far flank, in a position to ambush his tanks when they came in on the field, or target his trucks when they came into flank up the roads. A trucks speed on roads means they could get all the way to the centre of the battlefield and the objective that was going to land there, so I needed to stop them before they could get there and offload a huge amount of SMG short range fire. His tanks were not a threat to taking the objectives, only the 2 squads of rifles and 2 SMG squads. They needed to be my priority targets!

My rifle and armour run forward to cover the parachute landing zones

I advance to the road and get in soft cover of the bushes and forest

His light mortar in the fields got pinned by the co-ax machine gun from centre Matty, and being inexperienced, couldn't do much for the first half of the game. I should have left my Matty in a hull down position, I didn't need to advance to be the top of the hill. 

I also found once again I didn't need the movement trays, as I get more experience I think I can move my infantry fast enough without them. 

One of the Russian rifle squads moved into the house to the left, I brought up a LMG squad to hold the ruins on my side of the road. His MMG fired at my rifle squad in the fields but only got some pins. I dueled with the enemy rifle squad in the forest.

Target, Tank 20 degrees right!

His SU-76 came on the road in the back right corner, and spent the rest of the game dueling with my Matilda II there. I got several penetrations but only enough to stun, slow and then immobilize his engine. Being in cover I had the advantage here, though his gun was more powerful and got one penetration but didn't do anything I can recall. I stopped his tank moving, which he later mentioned afterwards then BLOCKED the road for one of his trucks to come on! He didn't need to bring the tank on there, so it was a poor choice to do so.

A Matilda II covers the landing zone

Light tank VIc covers the left flank

I brought on my Light (unpainted) tank on the left - I was very worried about a truck full of Soviet SMG's rocking up on that side. I should have stayed hull down though. I got some more fire onto his squad in the building.

The objectives have landed!

I rolled for where the parachutes would fall and one landed right on my troops on the right! The other landed close enough to the building his rifle squad was in to be able to claim it, though I didn't realize he was close enough till later. I was in a position to secure the blue briefcase.

Safe and Sound

LMG squad gets into the ruins

My 2nd LMG squad comes up to support the main objective. Despite being under MMG and rifle fire, my squad in front has had no casualties

Being in cover and having veteran troops resulted in that I didn't take a casualties until turn 3, half way through the game. His MMG fire in particular was ineffective. Meanwhile his regular rifle squad in the building and trees took many losses. The one in the trees got knocked down to one man left, though his belief in the motherland was stronger and didn't rout from multiple morale rolls. 

This really showed how much veteran troops are in surviveability. I think my front line troops need to be always veteran's. Not getting shot is better than trying to save afterwards.  Add a medic for another 6+ saving through makes them very hard to move out. 

I was also lucky the enemy only had an inexperienced mortar to fire HE and the Su-76 busy fighting one of my tanks.  His mortar finally got itself unpinned near the end of the game with the platoon commanders support and was able to put down several shells onto my LMG squad in the ruins, but was only hitting 2 men at a time, which was enough to pin them down though.

Dueling with the Soviets across the road

He brought on his light tank to fight my light tank. I then spent most of the game with it pinned and had to rally it later. I should have stayed behind the hill in a hull down position. At the end I did get some penetrations into his and put his tank on fire, but not get a kill.

PPSh's!

With my light tank busy, and my other tank not in ambush for it, one of his SMG squads roared up the road from the left flank and dropped an entire squad on my face. I was very lucky his other truck failed it's orders roll for two turns!

Close range firefight

I was very lucky my veteran troops survived, but I had 3 squads and the tank available to shoot them back so they got pinned down and took more casualties then they gave out.

I only had 1 man survive from my squad, but I had a medic and platoon commander there to help, while his squad did not.

His light tank is on fire! And the crew decided it was safer to stay in the tank!

Here comes in the very late 2nd SMG squad! Too late...

With the last turn of the game, the 2nd truck finally arrived from my right flank. My Matty on the right could have stayed in ambush, but I knew the truck couldn't get to an objective in time, so kept firing at the Su-76 instead. I'd had my right squad in the forest in ambush for a turn waiting for the truck to arrive, but moved them forward to the hedge on the last turn,

The 2nd SMG squad comes out, but too late to matter

Victory for Australia! And my first Bolt Action Tournament win!

With two objectives to one, the Australians defeat the Russians and secure the briefcase!

My plan worked pretty well. I was lucky with one of the parachutes landing on top of troops in cover to just reach out and grab it, but he was able to secure the other one from the building. The terrain favored me to hold it, but I think the fields favored his MMG and light mortar to cover them. 

My right hand Matilda II was in a good location, but I should have put the other one on the far left to cover the t-junction. I could then have put my light tank in the centre, where it can use it's autocannon better than the Matty's 2 pounder.  Looking at the terrain I could have put both tanks on the right to fight his tank, but the one in the centre did do good work pinning down the enemy infantry to it's front. But on balance it would have been better to put it on the far left to deal with his light tank...but he could have always kept it with the building between it and mine. It would have been better to keep it on the left to go into ambush and stop his truck coming down the road. 

I need a AT gun or tank on either flank to stop enemy trucks full of assault squads rocking up, they seem to be the best way to take objectives. I can get a truck full of  LRDG troops with SMG's, but it's very expensive and needs a platoon commander to quick time them out of the truck, so I'm relying on my 2 veteran rifle squads to do it instead. 

Also I kept forgetting to snap-to my Platoon Co. I need to do that! And I need two platoon commanders, 1 for 4 squads was too low I think though in this game all the squads were pretty close to each other so he was able to move around to support them.

I need to paint some flags to show I have captured an objective so it looks better than a dice sitting on it.

I'm not happy with the Warlord Games pin markers, they are too fiddly. I'm ordering some Litko fire,flames and smoke markers for next time -  small ones for one point, a medium one for 3 or 5. Like the old Epic Space Marine 3rd edition ones were, which undoubtedly helped designed Bolt Action too.

Having veteran infantry was once again crucial and won the game for me. The centre squad got knocked down to one man, but survived again due to the one medic roll that succeeded and held due to the platoon commander. Meanwhile his 2 regular rifle squads in the building and forest got knocked down to 1-3 men, though they were under as much fire as my centre squad was. 

The Soviet player had the better army list, and lost because one of his flanking trucks only arrived on the last turn. If it arrived at the same time as the other one he would have taken both objectives with ease - I was able to focus fire on one for two turns before the other showed up. I should have put both tanks on the flanks in ambush until they showed up - they were more of a threat to winning than the Su-76 was, though it would have done a huge amount of damage if it hadn't been dueling with my tank.

I could still have used an FO more I think than the centre Matilda II...


Coming up - the third game of the tournament -  A training exercise with American troops in Bastogne...

Best painted armies I saw at Small Unit Tactics IV

 I asked but didn't catch who actually won the best painted army at Small Unit Tactics IV, but here's the ones I liked:

 Germans in the mud of Stalingrad

I appreciated spending the time to make the background. All the...mud and grey and grim dark grimnes in the grim dark Stalingrad gets a bit...boring, but it looks like he spent a lot of time on the bases, which I liked. 
 

Polish Cavalry,  tankettes and a bear


I wanted to see this army when I was told about it, and there we have it. I asked later and the cavalry did NOT do much of anything, which I am bitterly disappointed at. I wanted to hear they charged enemy tanks (well, armored cars).  One day I would like to make a Polish army and make it a cavalry army. 
 
I also liked the clear plastic bases, which would make a lot of sense and not depend on where you're fighting to look good. 
 
Note the bear. They have a bear.  I don't know what unit the bear represents, but I hope it got some kills and survived every battle
 

DAK 90th Light Division with Brandenburgers

But this was my favorite. He spent the time to have an actual back story written up, including a unit of fake British traffic controllers and MP's,

It also looks like a great army for my army to have fought against, so I'm sad I didn't get a chance to do so.  
 
The painter Tim commented on Facebook:
 
Scrolling through FB and hey, that's my army! Was super chuffed to win best painted 🙂 It was a great day of BA, and I'm glad you enjoyed it too. I've found the BA community in Melbourne to be super welcoming. Looking forward to seeing you around - maybe get in that Aussies vs DAK match-up!

This sounds like an amazing army to build and would make a hilarious WW2 movie
 
Specifically, Leutnant von Leipzig was ordered to take a Brandenburg commando team and begin a reconnaissance effort of today's Niger and Chad to determine if German efforts could indeed be channeled to disrupting this supply line. Lake Chad and its surrounding areas were selected as being the most effective zones of disruption. About 100 Brandenburger troops were made available for "Dora". They were equipped with 24 British military vehicles, 12 40mm armed trucks, 4 British Jeeps with AA MG's, a command sedan, a signals truck, a gasoline and a water supply truck and a small mobile mechanical service truck. All participants had a solid command of either English or French, three also spoke fluent Arabic.

The team departed Tripolis in either June or July of 1942. The convoy drove via Hun and Sabbah bound for Marzuq (an Italian garrison in south eastern Libya). A "Feldflugplatz" was constructed about 35 miles from the town of Al-Qatrun (south of Marzuq). The idea was to deploy a number of refurbished Spitfires there (they were to be flown by Brandenburger pilots). Al-Qatrun was to serve as the primary base of operations. In July of 1942, von Leipzig divided his 100 man team into three smaller teams. He took charge of the first group.

The first group proceeded to advance towards the Tassili plateau in south-eastern Algeria. From there, the Brandenburger's proceeded to build another forward staging base. No sooner had they reached the Tassili mountain region, they were discovered by a French armored unit which immediately opened up fire. Over the course of the next few days, the Germans worked hard to stay one step ahead of the French. The French then proceeded to set up a trap for the Brandenburgers in a small Arab village located about 35 miles from the town of Ghezehida (Algeria).

The British and the French reacted in total panic - they had not expected to see German troops in that part of Africa. Additional French troops, British Colonial troops, special commando units, etc., were now ordered to converge on the Brandenburgers. To better effect their escape, the Brandenburgers now switched over to wearing French uniforms; having buried their German uniforms deep in the sand. The Brandenburgers did something cool and calculated - they drove right up to a French unit and told them that they were one of the many parties sent to the region to catch the dreaded German infiltrators. Because of their French language skills, the ruse worked. The local French commander gave them food and supplies. But then disaster struck. A French commander gave one of the Brandenburgers an order - to the only Brandenburg team member who spoke no French. Von Leipzig quickly took advantage of the confusion, ordered his men to their trucks and escaped with all his men - now bound for the Libyan border again. The French were so dumfounded that they waited until a more senior French military officer had arrived to help make sense of what just happened. Of this team, only four were killed in action (in a firefight with French forces on a mountain top).

The second group under the command of Feldwebel Stegmann proceeded to advance over the Tibesti mountain range in northern Chad and from there proceed towards Lake Chad. Their assignment was to operate in French Equatorial Africa and cause as much havoc as possible. Two days after departing, the team was "attacked" by Bedouins. Feldwebel Stegmann however maintained his composure and ordered every Brandenburger to remain perfectly still. It turned out that the "attack" was a Bedouin test of courage and allegiance. The Tibbu Bedouins also hated the French and they were very willing to help the Germans. With help, the Germans were able to infiltrate the ancient caravan town of Bardai. It was held by only a company sized unit of French troops. It did not take the Germans long to ascertain the fact that a strong contingent of French troops were on their way. A decision was thus made to return to Libya. 14 days later, all German Brandenburgers arrived safely in Marzuq.

The third group under the command of Leutnant Becker was to advance towards the Libyan town of Ghat (south-western Libya) and penetrate southern Algeria. They were to avoid combat situations if possible. After crossing the border town of Ghat, they ran into a village occupied by French forces. Through a series of clever subterfuges, the Brandenburgers were able to create a condition of medical quarantines in the region. This worked, and no additional French forces dared to enter a quarantine area. The local Arab people were willing participants to this ruse, as it made the hated French look as foolish as possible. The third group too returned unharmed to German lines in Libya.

After being recalled from Marzuq due to the British attack at El-Alamein, the Brandenburg commando's reported back that it would take at least a few divisions worth of men to successfully complete the designed mission. On the day that the Brandenburger's were recalled to Tripoli, the promised Spitfire a/c arrived. A few reconnaissance missions were flown, the resulting reports were however not encouraging. But it was too late, "Dora" was then canceled.

This sounds like a Comedy that deserves to make into a movie in the 1970's.


Saturday, 8 March 2025

1st Bolt Action tournament results and initial thoughts of the 1st game

Today I attended my 1st Bolt Action Tournament Small Unit Tactics IV. 3 games where some maneuver was required, using small 850 point armies with low order dice.18 Players playing at The Gaming Arena.

My army list was in the previous post and was a Early War British army list, based on the Australian 6th Division in Libya and Greece in 1941. The army itself is based on the uniform used in the attack on Bardia.

And I won 2 games out of 3!  

I was disappointed I didn't get a chance to fight the sole(?) Italian army or a DAK 90th Light. The Africa Korps 90th Light got the best paint job vote from me, as both the paint job and the extra effort of having a short paragraph written about the army and where it came from. There was also a Polish army with lancer cavalry, tanketts and a bear.
 
I would never win any paint awards, but I really need to write one for myself next time! Wasn't any point as I had a completely unpainted except for an undercoat Vickers VIC light tank. 

I also need to get a tray painted up as a diorama of assaulting one of the Bardia defence points to lay the army out.
 
Rommel's elite 90th Light Division of the DAK - an army I did not get a chance to play against to my sorrow
 

First Battle: 8th army training

First game was vs the only other British desert army - 1942 British 8th Army. It was obviously a training exercise in the desert. I should make some guys with little white flags to run around and mark shots and have clip boards, as this is going to be a common enough occurrence.
 
The mission was to take 5 objectives out in the middle of the table, but each side starts in a long corner of the table.  It was a desert map with 3 very nice MDF buildings (from a company that no longer exists), large nice stone hills (and usable(!) hills from Battlefield in a Box) and some light cover palm tree area's, with a crossroads (also Battlefield in a Box) that's been hit by artillery fire making craters for cover in the centre. A very nicely laid out table to represent a battlefield in Africa (even if the sand was very err Martian red).
 
Egypt, 1941

He had no tanks, two 40mm Bofers, more units and 14 order dice to my 9, including a light mortar (that got several first turn hits), and AT rifle (that missed every shot), more veteran infantry than I had and a LRDG truck with SAS armed with SMG's coming in on a flank.  Weirdly for a British army, neither of us had a Forward Observer! We both had concluded that 10% of the army in one guy was too much.
 
I should have taken the FO.  


His army list (with Warlord Games 8th Army figures) worked better than mine, and the terrain favored him slightly better, though I choose the side to attack from. The bomb holes and rocks made my two tanks harder to maneuver, and I put one on each flank to try and do something about the LRDG truck I knew was going to show up at some point. However, I didn't put my tanks in good positions to ambush it - I should have put a tank on the far left and right in ambush to stop it. Being LRDG they were going to show up turn 3. I thought the two buildings on my side of the table would make good defensive positions but the one I got in didn't have windows facing the enemy, and the other two story one I couldn't reach in time before being outflanked by his LRDG truck.
 
After game note: I believe now  that LRDG from reserve only help with a =1 to the orders roll to arrive if you're in a LRDG TRUCK, which I don't think he was.
 
The fight for the left and centre. My army is on the right

I also chose to flank with my light Vickers VIC tank, but that was also a mistake. I ran it from the right up the road, but instead of firing decided to try and engage ramming speed and run down a veteran infantry squad on the objective.  Being veteran's, they passed a unmodified morale role (no pins on them) and just got out of the way. I should have shot at them.
 
I have captured 2 objectives on the left of the battlefield (closes to camera) but the OPFOR has just captured the centre one and hold the 2 further down the road

He did try for ALL the objectives, instead of my plan on just going for 3 on the left and centre, but my units advanced badly and were uncoordinated.  On the left I had one large unit, one support LMG, a platoon commander and a tank, and they were able to take and JUST hold it, and broke his assaulting SMG unit, but the large unit and platoon commander got wiped out to one Sargent left in the process. They took both objectives on the left though! 
 
I should have left my inexperienced platoon commander in the building and hid and give out morale bonuses instead of trying to be a hero and get 1 SMG to shoot his infantry.
 
The OPFOR has captured 3 objectives in the centre and right

My centre attack was a bit of a shambles. My large rifle unit held a strong position in rocks through the game, but couldn't advance against his mirror like unit in the rocks opposite, the Matty didn't do much (though did destroy his centre Bofers) and the LMG support squad got pinned down by his LRDG squad that came in on their flank. I wasted my Light tank coming in on the right trying to run over and uselessly shoot at his larger infantry units when I should have targeted his truck and smaller LRDG team.
 
I should have focused fire on the LRDG team and truck and killed 3 enemy units instead of trying to take the centre objective. I might have then been able to run with the right side LMG team into the building in front and take the objective outside it's front door.  

I found I didn't need the movement templates, in this and the other 2 games, and don't really need them in small games. I can see in larger games being more useful, but none of the small armies I fought had large HE rounds either, so I didn't actually need to be spread out. In all 3 games no one bothered to use a template, but the largest HE round fired at infantry was only 1" anyway. 
 
Warlord Games should just bite the bullet and make HE rounds effect d2-d3-d6-1d6+3 targets IMHO.
 
His Bofer's soaked up some fire from my tanks but didn't do much - I should have used my tanks co-axs to shoot his infantry instead. Being slow meant my tanks could not maneuver much, but could ignore his Bofer's too with their mediam armour.  I do think he needed SOME ant-tank guns, he had enough anti-infantry weapons with his own infantry and infantry support weapons.

Large Veteran Troops in hard cover with a medic and platoon commander are extremely hard to do much of anything about. We both had veteran's in hard cover, he had a platoon CO and I had a medic  and they survived to the end of the game with multiple units shooting at them. Now that I think about it, killing his centre Bofers and soaking up their fire with my Matties meant he didn't use his HE rounds on my infantry, and I need some HE to blow up troops in hard cover.  Doh, that's what a light and mediam mortar are for!

I should get TWO rifle platoons with 2 squads each (one 9-10 rifles and one small 5 man LMG support team), each with a platoon commander and medic, and maybe an AT Rifle. And a light mortar!  

I also found after 3 games I really need to do what everyone else seems to do and get a truck loaded with a SMG squad to come in on a flank. I should get one squad of SAS in a LRDG truck for that, even if it is completely unhistorical to get one for the siege of Bardia/Tobruk/Greek Campaign.

I lost the battle 2 objectives to 3. We both lost one unit - my platoon commander vs one of his 40mm Bofers. He played better and used his army better, though he's played a lot more Bolt Action games than I have. My medic made only one save, but it saved the life of the only man left in a squad, so was well worth it!
 

Coming up...The 2nd Battle: The Russians are coming for the Briefcase again!

Emergency army list for my 1st Bolt Action Tournment: You go to war with the army you have

To quote one of the worst US SecDef's in history " You go to war with the army you have, not the army you might want or wish to have at a later time".

And he stuffed up his own quote, it should be: "You go to war with the army you have, not the army you wish you have".

 I couldn't get the energy to finish my two Bren Gun Carriers, so I took my undercoated Vickers VIC,

The plan was for each 9 man rifle unit to advance to one objective, have the 5 man LMG squad in their support, with a Matilda II backing each up.  The medic and platoon commander float where they are most needed and the VIC flanks the enemy position.

How it went, will be my next post....


Total Points: 850
Order Dice: 9
Platoon #2
*Version 3 - British - Rifle Platoon
Platoon Commander
Platoon Commander (Version 3 Rulebook page 234) 28Inexperienced
QtyWeaponsRangeShotsPenSpecial
1Platoon Commander


1Infantry (equipped as modeled)
--

 with Pistol6"1n/a 

 with Rifle24"1n/a

 with Submachine gun12"2n/aAssault

Infantry
Infantry Section (Version 3 Rulebook page 235) 117Veteran
QtyWeaponsRangeShotsPenSpecial
1NCO with Rifle24"1n/a
8Infantry with Rifle24"1n/a

Infantry Section (Version 3 Rulebook page 235) 117Veteran
QtyWeaponsRangeShotsPenSpecial
1NCO with Rifle24"1n/a
8Infantry with Rifle24"1n/a

Infantry Section (Version 3 Rulebook page 235) 80Veteran
QtyWeaponsRangeShotsPenSpecial
1NCO with Rifle24"1n/a
3Infantry with Rifle24"1n/a
1Infantry with Light Machine gun (requires loader)36"4n/a

Infantry Section (Version 3 Rulebook page 235) 80Veteran
QtyWeaponsRangeShotsPenSpecial
1NCO with Rifle24"1n/a
3Infantry with Rifle24"1n/a
1Infantry with Light Machine gun (requires loader)36"4n/a

Medic
Medic (Version 3 Rulebook page 234) 23Regular
QtyWeaponsRangeShotsPenSpecial
1Medic


Medics

 with Pistol6"1n/a 

Platoon #3
*Version 3 - British - Armoured Platoon
Command Vehicle
Matilda & Valentine Infantry Tank (Version 3 Rulebook page 241) 155Regular
QtyVehicle
  Weapons
Type
Range
Trans
Shots
DV
Pen

Special
1Infantry Tank Mk II Matilda Mk II


Tracked-9+Slow
   Turret-mounted light anti-tank gun48"1+4HE (1")
   Co-axial MMG36"3n/a

Cmd Vehicle Options
Command Vehicle rule (v3) (Version 3 Rulebook page 188) 10

Command Vehicle special rule

Vehicle
Matilda & Valentine Infantry Tank (Version 3 Rulebook page 241) 155Regular
QtyVehicle
  Weapons
Type
Range
Trans
Shots
DV
Pen

Special
1Infantry Tank Mk II Matilda Mk II


Tracked-9+Slow
   Turret-mounted light anti-tank gun48"1+4HE (1")
   Co-axial MMG36"3n/a

Light Tank (Version 3 Rulebook page 240) 85Regular
QtyVehicle
  Weapons
Type
Range
Trans
Shots
DV
Pen

Special
1Light Tank Mk VI C


Tracked-7+
   Turret-mounted light automatic cannon48"2+2HE (1")
   Co-axial MMG36"3n/a