Showing posts with label Strategy & Tactics. Show all posts

Saturday, 8 February 2025

Post first game of Bolt Action Army List, Strategy and Tactics

After my first Bolt Action game last week, I have thoughts:

Strategy: 

  1. Cover is essential for infantry to stand a chance. For key units, a medic too, for the extra 6+ save.
    1. Smoke rounds from mortar's can do this.
    2. Otherwise, infantry must RUN from cover to cover, with a supporting unit to get pins on enemy units nearby.
  2. Matilda II tanks are a waste as veteran except for facing early war armies. Late war tanks with heavy armour are worth it.
    1. Tanks should be hull down or otherwise in cover too when possible. 
  3. A lot of terrain will end up being buildings, and you want engineers for that (to fight in CQB at the same time).
  4. Infantry LMG's are useful, but not huge if you have other units with the range.
  5. I need mobile infantry to take objectives or flank the enemy. 
  6. I need 2-3 spotters for artillery or mortars for indirect fire across the battlefield
    1. Artillery spotters will be primary target #1 and need extra bodies for flak armour
    2. Indirect fire at units ignore cover which is very useful vs infantry hiding it in!
  7. Units can fail orders and be pinned even if they take no casualties. Full strength infantry squads avoid that, at least for a turn or too.  
  8. Having commanders to be able to "You men, step-to" will be very useful for using mortars and pinning enemy units before they move.
  9. 1 need more order dice to both having the initiative and step-to units.
  10.  Snipers placed at the front line will be too vulnerable to act as scouts.

Tactics:

So that leads to the following army:

  1. One Rifle Squad in the Commonwealth armies secret weapon of Universal Carriers. I can't afford three, but one per "platoon". Gives speed, armour and a Bren gun.
    1. Each is a Bren Gun squad, so will use the carriers to flank the enemy or quickly get in a good firing position. 
    2. They may also come in as reserve to flank the enemy or just where they are needed, as the real estate will be tight.
  2. One full strength engineer squad to advance and assault defended buildings. 
  3. One tank in direct support of each platoon, they are both inexperienced
    1. Tanks should be held back and not Advance much.
  4. One light mortar per platoon of rifle+engineer+tank and one mediam mortar for a spotter and larger smoke round.
  5. AT rifle for an order dice and some anti-tank capability for each platoon.
  6. Each platoon lead by one platoon commander, with a 3rd one behind as a backup. 
  7. Medic for 6+ save for first platoon and an order dice.
  8. First platoon attacks the objective (ideally from the flank), second platoon provide/s a base of fire for the other. 

Army list:

So 2 platoons to attack - one each of Bren Gun carrier, rifle squad + Bren gun, engineer squad, light mortar, AT Rifle and a Platoon commander. One advances for the objective (ideally on a flank), the other covers it and provides a base of fire, but both can move forward initially. The medium mortar and artillery FO supports the main thrust with strikes and smoke. 

Each "platoon" is to attack one area.

I don't have the points for a company commander or more anti-tank defence. If I had more points I could get a 2 pounder portee to be held in reserve and a company commander, along with another rifle or engineer squad. I also can't afford to get veteran troops.


Total Points: 1097
Order Dice: 18
Platoon #1
*Version 3 - British - Rifle Platoon
1100 mattie rifle enginner mortars
Platoon Commander
Platoon Commander (Version 3 Rulebook page 234) 30Regular
QtyWeaponsRangeShotsPenSpecial
1Platoon Commander


 with Pistol6"1n/a 

 with Rifle24"1n/a

 with Submachine gun12"2n/aAssault

Infantry
Infantry Section (Version 3 Rulebook page 235) 65Regular
QtyWeaponsRangeShotsPenSpecial
1NCO with Rifle24"1n/a
3Infantry with Rifle24"1n/a
1Infantry with Light Machine gun (requires loader)36"4n/a

Infantry Section (Version 3 Rulebook page 235) 65Regular
QtyWeaponsRangeShotsPenSpecial
1NCO with Rifle24"1n/a
3Infantry with Rifle24"1n/a
1Infantry with Light Machine gun (requires loader)36"4n/a

Medic
Medic (Version 3 Rulebook page 234) 23Regular
QtyWeaponsRangeShotsPenSpecial
1Medic


Medics

 with Pistol6"1n/a 

Forward Observer
Forward Observer (Artillery) (Version 3 Rulebook page 234) 97Regular
QtyWeaponsRangeShotsPenSpecial
1Forward Observer (Artillery)


Infiltrator
2Infantry (equipped as modeled)
--

 with Rifle24"1n/a

 with Pistol6"1n/a 

 with Submachine gun12"2n/aAssault

Transports
Bren Carrier (Version 3 Rulebook page 248) 50Regular
QtyVehicle
  Weapons
Type
Range
Trans
Shots
DV
Pen

Special
1Bren Carrier


Tracked57+Open-topped, Turn on the spot

Tow: Light or medium anti-tank gun
   Forward-facing LMG36"2n/aFront arc

Bren Carrier (Version 3 Rulebook page 248) 50Regular
QtyVehicle
  Weapons
Type
Range
Trans
Shots
DV
Pen

Special
1Bren Carrier


Tracked57+Open-topped, Turn on the spot

Tow: Light or medium anti-tank gun
   Forward-facing LMG36"2n/aFront arc

Platoon #2
*Version 3 - British - Engineer Platoon
Platoon Commander
Platoon Commander (Version 3 Rulebook page 234) 30Regular
QtyWeaponsRangeShotsPenSpecial
1Platoon Commander


 with Pistol6"1n/a 

 with Rifle24"1n/a

 with Submachine gun12"2n/aAssault

Engineers
Infantry Section (Engineers) (Version 3 Rulebook page 235) full strength110Regular
QtyWeaponsRangeShotsPenSpecial
1NCO with Rifle24"1n/a
9Infantry with Rifle24"1n/a

EngineersEngineers

Infantry Section (Engineers) (Version 3 Rulebook page 235) full strength110Regular
QtyWeaponsRangeShotsPenSpecial
1NCO with Rifle24"1n/a
9Infantry with Rifle24"1n/a

EngineersEngineers

Platoon #3
*Version 3 - British - Heavy Weapons Platoon
Platoon Commander
Platoon Commander (Version 3 Rulebook page 234) 30Regular
QtyWeaponsRangeShotsPenSpecial
1Platoon Commander


 with Pistol6"1n/a 

 with Rifle24"1n/a

 with Submachine gun12"2n/aAssault

Heavy Weapons
Mortar Team (Version 3 Rulebook page 238) 55Regular
QtyWeaponsRangeShotsPenSpecial
1Medium Mortar team12"-60"1HETeam (3 men), Fixed, Indirect fire, HE (2")

SpotterSpotter

Mortar Team (Version 3 Rulebook page 238) 30Regular
QtyWeaponsRangeShotsPenSpecial
1Light Mortar team12-36"1HETeam (2 men), Indirect fire, HE (1")

Mortar
Mortar Team (Version 3 Rulebook page 238) 30Regular
QtyWeaponsRangeShotsPenSpecial
1Light Mortar team12-36"1HETeam (2 men), Indirect fire, HE (1")

Anti-tank
Anti-Tank Team (Version 3 Rulebook page 237) 25Regular
QtyWeaponsRangeShotsPenSpecial
1Anti-tank rifle team48"1+2Team (2 men)

Anti-Tank Team (Version 3 Rulebook page 237) 25Regular
QtyWeaponsRangeShotsPenSpecial
1Anti-tank rifle team48"1+2Team (2 men)

Platoon #4
*Version 3 - British - Armoured Platoon
Command Vehicle
Matilda & Valentine Infantry Tank (Version 3 Rulebook page 241) 131Inexperienced
QtyVehicle
  Weapons
Type
Range
Trans
Shots
DV
Pen

Special
1Infantry Tank Mk II Matilda Mk II


Tracked-9+Slow
   Turret-mounted light anti-tank gun48"1+4HE (1")
   Co-axial MMG36"3n/a

Cmd Vehicle Options
Command Vehicle rule (v3) (Version 3 Rulebook page 188) 10

Command Vehicle special rule

Vehicle

Sunday, 2 February 2025

Thoughts after completing my first Bolt Action game

 Battle report will come later I hope. Lot to think about. In random order:


The Red Spy is in the base! Protect the intelligence! 

We need to protect the briefcase!

The mission was The Red Spy Is In The Base: PROTECT THE BRIEFCASE.  I have been dreaming of that mission for weeks. It was the perfect mission I wanted to play.

FO's are as good as everyone says there were. I got lucky with one direct hit and lots of pins on 2-3 units at a time. I should get a recce platoon and stick one in a Bren Gun Carrier keep him from getting sniped.
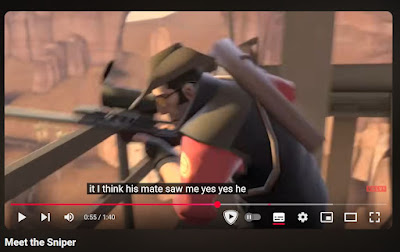
I think his mate saw me. Ping! Yes, yes he did.

I need to shoot my Sniper immediately. I didn't, got counted sniped and should have targeted his sniper that was hunting mine. My Sniper was a waste, though it did keep his sniper busy for 2 turns.

His mediam mortar didn't do much until I left a squad under it's target icon and it wiped out the squad in 2 turns.  Always move units targeted by mortars!

He set up his MMG to cover the objective in a classic setup to cover the objective down the road in ambush, and I fell for it. An excellent use for it, and out of range of my light mortar. 

I should have run my platoon commander in front of it to get it to shoot first, THEN run the rest of the squad over!

Inexperienced platoon commanders can work fine, particularity if they just have a pistol and no other men with them.

Veteran Matilda II's aren't worth it unless your opponent is playing early war too. 

8 men are the minimum to assault and hold an objective, but you really want 10. 

A 8-10 man assault squad backed up by 5 man LMG squad works well.

My regular troops kept failing order tests and his kept passing.  I need some veteran engineers or recce infantry as assault troops. 10 man squads are also useful because you WILL take pins before you take casualties.

When an enemy tank with a heavy anti tank gun is to your front, activate your armour first!

FO's don't need to wait till the end of the turn, they can mark their target one enemy units at the target location have completed their orders!  

I got lucky with my 2nd FO artillery strike, it deviated onto another one of his units, though just missed hitting his Stug IV. 

Smoke rounds for artillery or my mortar should have been dropped on the objective once I knew I was going to get to it first.

When you get the briefcase, you STOP.  Remember that next time.

 I don't think you can daisy chain the brief case to run away, so any unit going for it must RUN every turn. You don't have time to advance or fire!

Veteran troops in cover are very survivable.  

Having a tank, small LMG cover squad and larger assault squad works. 

Pinned units can unpin themselves very easily. I dropped artillery on a Stug IV and it just shrugged off 3 pins next turn.

Template weapons are what you use to attack enemy infantry in cover.

If taking two tanks, always use the tanks together. Don't drive off in another direction, particularly with slow tanks!

I could have put my tanks in hull down and got cover from that and still covered the objective. 

I need to get 2 man, 4 and 5 man movement templates, 1 inch apart to maintain coherency and 1 inch boundary.

I need to mark my unit types (I ran out of time yesterday). 

Getting 2-3 assistants as meat shields for the FO is worth it. Arm them with rifles or SMG's as a small squad to use as a reinforcement later in the battle, and being able to act a s spotter for light mortars. 

The AT rifle didn't hit an enemy tank (though it took a shot it missed the flank of the Stug IV) but it killed 2-3 infantry so that was ok.

Snap too is a very good command to get things done, but you WILL lose the initiative of choosing what to do after your opponent will, so it looks pretty balanced. There's a reason not to do it every turn or use a Company Commander to move 4 units at once. You don't need to do it.

I kept failing my order dice rolls and had 2 morale roles and Lt was close enough to do and good enough to do. Coy Co's are not required in all army lists. 

I had an order dice advantage, but using a snap too would remove it. I need more order dice.

The Medic made his points back, but would not have if he'd had an assistant.  

Bolt Action is REALLY good at not stopping or slowing the game down. I kept doing an order, and stopping to sit down to wait for when it's my turn but you don't do that.  Conversely there's suspense of not knowing if it's your turn next and happiness when you get multiple orders in a row and despair when your opponent does.

There is not going to be a Conquest Bolt Action tournament :(. No one's put their hand up to do it, and they don't have the room left now for the tables :(.

I need to keep track of turns with a big dice in the corner.

I think I maintained sight on the objective better, but at the end, a lone Sargent, a Lt and the medic were the only ones near the briefcase, with the Sargent going hell for leather why a squad of Finns with MP39's and a 75mm Stug chased after him, while the AT rifle, light mortar and 4 men from another tried squad tried to hold them off. The FO and one assistant were stuck on the other side of the battlefield.  Very comic book like I must say. It ended in a draw, but I needed 2 turns to escape because the unit with the briefcase got stuck going DOWN after a failed order roll. Another reason to get some veterans.


I still need one day to get a Bolt Action army printed out as the Team from Team Fortress. I would have so many lines to use!

Monday, 27 January 2025

Further tactical thoughts about my Bolt Action army

I've given some thought to yet more theory-crafting for my Bolt Action army.

Everything I've learnt about the desert, historical warfare and wargaming is you need to be mobile. Not the entire army, but enough you can advance to cover, take objectives and flank the enemy.  You still need someone to get the enemies attention, but movement and flanking win battles.

Unlike Glory is Fleeting, in Bolt Action you can bring on reserves ANYWHERE along your deployment zone and flank ANYWHERE on one side or the other. To me, using this is priceless. Being able to being on a reserve where I need it is very powerful, even if it's delayed for 1-2 turns. And I suspect most games your opponent won't have a clue what you're bringing on, or where. 

And I can keep an element of surprise (which is VITAL) because the enemy won't know if it's coming on my deployment zone OR the flanks outside theirs. Granted it can't be till turn 3 or  , but they can still come on from my reserve instead of the flank if needed. 

But I don't think I have the manpower to put my entire carrier platoon on a flank march. But I have three of them. So one squad would deploy as my reserve. Either to come in from an unexpected angle, support the main units or be a counter attack. The other two (including the Platoon commander) would come on in a flank - ideally behind a smoke barrage as cover so they can spend a turn moving FAST before dropping of their infantry for close enough assaults. If the 1st one is still around, it can also move up to support the other two, so should ideally come on near where the flank units will. 

The anti-tank equipment squad of engineers would move with the platoon commander, company commander and anti-tank rifle team. Having the Co Coy means both carriers can be snapped too to get on the same turn AND deploy their infantry if needed. The AT rifle is going to need flank and rear shots to hurt any tanks too.

I have thought of making the Engineer Carrier platoon a Recce platoon instead. Not so good at building assaults, but more survivable and would make more thematic sense. And I can get a very powerful SECOND Artillery spotter, which I really should have as British. However, it means I need to lose a Matilda II and the company commander (and get a light tank VIC instead). Being able to call in a 3rd or 4th artillery barrage as the infantry go in sounds very very nice. I would probably use the Rifle Platoon Artillery spotter to drop smoke for where the flanking carriers would come in with the light tank. I will need to test it out in some solo games.

The 1st list would have the two Matilda's working with the Rifle Platoon to hold the line and engage enemy tanks.  The 2nd would have just one Matilda II, but both have one carrier with a squad to reinforce the rifle platoon.

Both army lists below the line.

Wednesday, 8 January 2025

Video of a US reinforced platoon attacking a town in a training exercise

Video of a US reinforced platoon attacking a town in a training exercise 

 I finally found it: a video showing a reinforced platoon conducting an attack. 3 squads (of 5 engineers as they have satchel chargers), 3 5 man rifle squads (cover party for each assault squad with a light machine gun, a mediam mortar squad (with spotter), MMG squad, Bazooka squad, 2 tanks in reserve. Command by a platoon commander (by himself).

Turn by Turn Description:

Initial bombardment of the objective and then smoke (!) rounds before the infantry go in, Note: Smoke rounds seem to suck in Bolt Action. 

1st squad in wedge formation, rest in column. Medium mortar deploys behind them. 

Lead squad in the centre, one other squad on each flank. 

Recoilless rifle between 2 of the squads, bazooka next to the right and the LMGs between them.

Smoke stops firing before the infantry goes in as all infantry units opens fire on the defenders in the buildings. 

Medium mortar using a spotter does counter battery fire on enemy mortar.

Left squad runs into the first objective building (doing an advance and then a run), rest of the infantry shoot at other targets, they assault and take it.

LMG squad gets pinned so mortar fires smoke(!) to cover them.

Left squad shoots at one building and the LMG team shoot at 2nd from upstairs,

They switch to a new building as the other squad assaults the 2nd building,  again doing an advance and then a run.

Platoon CO gets into the first building and goes to its roof.

One squad uses a Engineer demo charge(!) to enter another building.

Bazooka shoots at t the next building and left squads assaults it (with a grappling hook to the 2nd level!).

 Bazooka fires smoke(!) and the LMG team come up to support the squad with the Bazooka.

Last squad and RR comes into town.

Squad attacks the next building from the roof and work their way down. LMG team covered the door.

Tanks come in from reserve and shoots the next building, Squad goes in and assaults the basement with an engineers charge.,

One injury gets a medic.

Last building surrenders when their army reaches it's break point.

Company commander gets 2nd platoon through to the next target.

Note: The enemy seems to consist of about six, 5 man squads of infantry with LMG's and 1 mediam mortar.

Conclusion:

To win in a buildup area, use Surprise, firepower, good troops. Do an artillery barrage first, then a smoke barrage. Use engineers to assault buildings, rifle squads to cover them with LMG's. MMG and Bazooka to cover flanks and shoot into buildings. Mortar in the rear for support and tanks in reserve to come up later. Medic at the back for support.

The Army list:

It works out with early war Sherman's to be 1100. Have to get some extra platoon commanders but making the heavy weapons commander inexperienced makes it work! I do have to drop the Recoilless Rifle though and not replace it with another bazooka.
 

Total Points: 1097
Order Dice: 16
Platoon #1
*Version 3 - U.S. - Rifle Platoon
Platoon Commander
Platoon Commander (Version 3 Rulebook page 220) 30Regular
QtyWeaponsRangeShotsPenSpecial
1Platoon Commander


 with Pistol6"1n/a 

 with Rifle24"1n/a

 with Submachine gun12"2n/aAssault

Infantry
Infantry Squad (Version 3 Rulebook page 221) 66Regular
QtyWeaponsRangeShotsPenSpecial
1NCO with Rifle24"1n/a
4Infantry with Rifle24"1n/a
1Infantry with BAR M1918A2 Automatic rifle30"2n/a

Infantry Squad (Version 3 Rulebook page 221) 66Regular
QtyWeaponsRangeShotsPenSpecial
1NCO with Rifle24"1n/a
4Infantry with Rifle24"1n/a
1Infantry with BAR M1918A2 Automatic rifle30"2n/a

Infantry Squad (Version 3 Rulebook page 221) 66Regular
QtyWeaponsRangeShotsPenSpecial
1NCO with Rifle24"1n/a
4Infantry with Rifle24"1n/a
1Infantry with BAR M1918A2 Automatic rifle30"2n/a

Medic
Medic (Version 3 Rulebook page 221) 23Regular
QtyWeaponsRangeShotsPenSpecial
1Medic


Medics

 with Pistol6"1n/a 

Forward Observer
Forward Observer (Artillery) (Version 3 Rulebook page 221) 75Regular
QtyWeaponsRangeShotsPenSpecial
1Forward Observer (Artillery)


Infiltrator

 with Rifle24"1n/a

 with Pistol6"1n/a 

 with Submachine gun12"2n/aAssault

Anti-tank
Bazooka Team (Version 3 Rulebook page 224) 60Regular
QtyWeaponsRangeShotsPenSpecial
1Bazooka team24"1+5Team (2 men), Shaped Charge

Platoon #2
*Version 3 - U.S. - Engineer Platoon
Platoon Commander
Platoon Commander (Version 3 Rulebook page 220) 30Regular
QtyWeaponsRangeShotsPenSpecial
1Platoon Commander


 with Pistol6"1n/a 

 with Rifle24"1n/a

 with Submachine gun12"2n/aAssault

Engineers
Engineer Squad (Version 3 Rulebook page 222) 55Regular
QtyWeaponsRangeShotsPenSpecial
1NCO with Rifle24"1n/a
4Infantry with Rifle24"1n/a

Engineer Squad (Version 3 Rulebook page 222) 55Regular
QtyWeaponsRangeShotsPenSpecial
1NCO with Rifle24"1n/a
4Infantry with Rifle24"1n/a

Engineer Squad (Version 3 Rulebook page 222) 55Regular
QtyWeaponsRangeShotsPenSpecial
1NCO with Rifle24"1n/a
4Infantry with Rifle24"1n/a

Platoon #3
*Version 3 - U.S. - Heavy Weapons Platoon
US Town attack training platoon 1100
Platoon Commander
Platoon Commander (Version 3 Rulebook page 220) 21Inexperienced
QtyWeaponsRangeShotsPenSpecial
1Platoon Commander


 with Pistol6"1n/a 

 with Rifle24"1n/a

 with Submachine gun12"2n/aAssault

Heavy Weapons
Medium Machine Gun Team (Version 3 Rulebook page 223) 50Regular
QtyWeaponsRangeShotsPenSpecial
1Medium Machine gun team36"6n/aTeam (3 men), Fixed

Mortar Team (Version 3 Rulebook page 224) 45Regular
QtyWeaponsRangeShotsPenSpecial
1Medium Mortar team12"-60"1HETeam (3 men), Fixed, Indirect fire, HE (2")

Platoon #4
*Version 3 - U.S. - Armoured Platoon
Command Vehicle
Sherman Medium Tank (Version 3 Rulebook page 227) 195Regular
QtyVehicle
  Weapons
Type
Range
Trans
Shots
DV
Pen

Special
1M4 Sherman 75mm medium tank


Tracked-9+Easily catches fire, Weak Sides
   Turret-mounted medium anti-tank gun60"1+5(75mm) HE (2"), Gyro-stabiliser (Veterans only)
   Co-axial MMG36"6n/a
   Forward facing hull-mounted MMG36"6n/aFront arc

Cmd Vehicle Options
Command Vehicle rule (v3) (Version 3 Rulebook page 188) 10

Command Vehicle special rule

Vehicle
Sherman Medium Tank (Version 3 Rulebook page 227) 195Regular
QtyVehicle
  Weapons
Type
Range
Trans
Shots
DV
Pen

Special
1M4 Sherman 75mm medium tank


Tracked-9+Easily catches fire, Weak Sides
   Turret-mounted medium anti-tank gun60"1+5(75mm) HE (2"), Gyro-stabiliser (Veterans only)
   Co-axial MMG36"6n/a
   Forward facing hull-mounted MMG36"6n/aFront arc


Saturday, 23 March 2024

Not great, not terrible: League of Ancients Glory is Fleeting March 2024 tournament results

 I could only play 2 games for the first day (children birthday parties take precedence these days) and I got two draws, with both a loss on points. I did not get an actual LOSS, which when playing against other players who have much more experience than I do, I can take as a small positive.

At the end of the first day I was placed 7th, or 4th last.

The first battle I forgot the classic Napoleonic strategy: use combined arms. Something that is...hard with a British army that insists on not having mixed divisions. I placed my elite British division to outflank the enemy army, while moving the Portuguese and Cavalry divisions to fix his line in place. The Spanish sat back and defended the LOC.

And this plan lasted right up to the point of enemy contact

...And then he put his cavalry divisions (two of them!) to face my British Division. I had forced marched after arriving turn 2 (should have done it turn 1). My elite troops passed on all their force march rolls...and then got stuck facing 3 cavalry brigades.

Napoleonic infantry cannot advance against enemy cavalry.

I was able to use the attached artillery batteries to batter his cavalry down, but I couldn't move forward very fast. I ended up CHARGING his cavalry with my infantry, which didn't work. Without an attached cavalry brigade to exploit it, or a cavalry division right next to it, I couldn't push to his LOC before he reached my front line Portuguese, who were then outnumbered. 

I also made the same mistake the British commander did at Battle of Albuera where I left a infantry brigade out of square right next to a enemy cavalry unit on my flank. A stupid mistake that wiped out 2 of the 3 Portuguese brigades.

I was able to us my cavalry to slow HIS other flank down, but not enough to prevent it getting to my defence line, but I still don't understand how to do it, even while his cavalry did it to me at the same time. :(

Having an elite corps commander wasn't worth the points in either game-  if I had a 2nd small cavalry division with the British troops (if I can afford it), it might have gone better.

Edit- it DID allow me to go on the attack each time, and BLOCK the enemy flank attack. Which is dumb that I had a large Portuguese infantry unit designed for defence! If I have an elite corps commander, I am likely to be on the attack AND able to choose the battleground terrain,  Something a Skilled Corps commander may not get. I am certain both times the enemy general wanted to do a flank attack, but was foiled by my elite corps commander. Therefore, I need to assume when using a skilled or competent corps commander, I will be attacked in the flank.

The 2nd game was closer...this time I paired the British Calvary on the flank of the British Infantry, with the Portuguese holding the centre and the Spanish the far flank, covered by Terrain. So I could use the Cavalry to directly support the Infantry this time.

I made a somewhat risky charge with my cavalry and broke two of his units...but a large unit passed it's morale tests and just stood in square on top of his LOC and blocked me from going anywhere near it. My infantry with attached artillery got 1 turn to shoot it before having to about face and engage the arriving enemy reinforcements. 

I then got 1 turn of winning the skirmish battle...but it was 1 turn left to go and I had to attack before the skirmishers impacted the enemy infantry and artillery units. I had 5 skirmish markers across his entire line including his two heavy artillery units.  I attacked with my large Portuguese into enemy heavy artillery and it ended in a slaughter. I don't have the time to win the skirmish fight. Which is supposed to be one of the great strengths of the British army in the Peninsula! 

I also didn't place both small infantry units with the attached artillery TOGETHER, so they couldn't shoot the same target, meaning they didn't do much of anything shooting at 2 different large targets. 

Light infantry now move through rough terrain without a problem. Would have been useful in the 2nd game where my large elite British unit got stuck. If I need to block enemy movement, use difficult terrain instead.

Post battle thoughts:

Defense units like the Spanish need LARGE units. So many times in the 2nd game I did nothing when attacking defending large enemy units, and they need to be large to fight off large enemy cavalry units. The small units can hold off enemy cavalry but not defeat them. A unit of fresh Spanish Lancers would be helpful to take advantage of it too, but is expensive. 

British trained Liner (skirmish) troops attack too slowly. You double move to close to the enemy...and STOP at 6.00001 inches. Out of bombardment AND skirmish range. Then you spend the next turn advancing....4 inches closer to 2.00001. Meaning you are now in bombardment range and skirmish range...but out of charge or volley range still. Then on the 3rd turn...you can advance into volley range or charge. Which isn't much use if you haven't had the luck to get one turn to degrade the enemy first! And you won't have enough attached artillery batteries to do much AND you can't afford the elite light troops to win the skirmish battle either! 

Conclusion: British trained skirmish liner troops are much better on the defence.They move too slowly to the attack - the enemy will either be able to attack you first, or simply move 3 inches BACK out of charge range again! AND you must have more artillery (ha!) or more skirmishers (which is only going to be equal vs reformed troops!).

I don't think having a large British unit helped or was needed, and just cluttered up my attack. Superior Veteran troops are enough.

Superior Veteran troops are perfectly capable of force marching and can be used on a flank march turn 1.

I need a small cavalry division to either guard one flank OR support the main attack. 

Enemy cavalry divisions seem to have settled on only having 2 units, so one large unit and one rear support unit should be enough.

Having 4 British units in one division got in the way, one unit always didn't do much. A cheaper Portuguese unit for support would do, perhaps a small veteran one. 

Having a charismatic corps commander didn't help much in either game, but might have been useful still. Both battles, the elite corps commander allowed me to attack on my own plan...which then didn't work very well. 

When using terrain to anchor your line, it needs to be difficult, not rough. Rough won't slow down light infantry at ALL, and cavalry can move through it easily enough.

A Revised army list

See after the cutoff

Saturday, 16 March 2024

Army list for League of Ancients Glory is Fleeting March 2024 tournament

 In a few weeks the League of Ancients will have a Glory is Fleeting tournament, Above is my list.

The Corps Commander is the Duke of Wellington himself. Able to pass command points to the Spanish if needed (that cost 2 for 1 point applied), he must be charismatic so  will also join in in the crucial charge needed or to rally an important unit. 

The 1st Division is the attacking division. It should be able to defeat nearly any other infantry division.The large brigade is in the middle and the two British units on either side, able to use their attached artillery to target what the Highlanders will be charging, The KGL unit directly supports the charge or acts as a flank guard and division reserve.

The Portuguese Division moves up with the 1st Division and guards one flank with it's higher number of skirmishers. One brigade stays behind as a reserve or extra flank guard. They should not attack themselves initially as they lack any artillery but can help pin down the enemy line with the attached light infantry companies. The large unit can be used to hold Strong-points and towns.

The Cavalry Division moves up on the other flank of the 1st Division to guard it's other more open flank. The Portuguese Cavalry are the reserve and stay behind the other two as direct support. Their charismatic commander will go in with chargers and help rally them afterwards.

The allied Spanish Division is to guard the Line of Communication only. The Provincial Levies stay behind the two conscript units and give them direct support and a morale bonus - equivalent to drilled level of morale. Their attached Spanish Cavalry will hopefully allow them to drive off enemy skirmishers. 

Any attack must be done at full speed with force. The 1st Division must break the enemy line before the rest of the army is outnumbered. If the enemy has an artillery brigades in the middle of their line, I need to use the Portuguese with their skirmish attachments or the cavalry to lengthen the front line to break the enemy line of battle up.

On the defence, I need to use hills and reverse slope to hide my infantry from the inevitable enemy artillery brigades. The 1st Division needs to move to block the main enemy attack, and ideally counter attack it. The Portuguese hold one flank, the cavalry the other, with the Spanish as the corps reserve (possibly directly supporting the 1st Division in a counter attack). 

Missions: 

On the defence in Foothills, take the one road and town and use in my half of the table to prevent flanking attacks down the road from the side.

Block Flank, Frontal Assault and Prepared attack missions (4,6,5) in that order.

Frontal and Prepared Assault: 1st Division attacks and charges. 2nd Div protects its flank, Cavalry the other. Spanish hold the LOC. 

Flank Attack: 1st Division flanks. 2nd moves to support, Cavalry hold other flank and Spanish the LOC.

Probe: Only use if enemy flank march has been blocked. 1st Division on table, Portuguese in reserve. Cavalry reinforce the more open flank.

Flexible Defense: Hold 1st Division in reserve. Place units in reverse slope. Place 1st Portuguese large unit in strongpoint.

Positioned Defense: Put 1 town and road, and place road to town to prevent flank marchers. Use 1st  Portuguese in strongpoint. Place other units on a  reverse slope.  

ChatGPT Says:

This plan emphasizes aggressive, coordinated attacks with the 1st Division as the spearhead, supported by the Portuguese and cavalry divisions. The Spanish division plays a defensive role, guarding the Line of Communication and providing support. The plan leverages Wellington's charisma and leadership to inspire and rally troops in critical moments.