A web log of my historical wargaming. Mostly devoted to Field of Glory Napoleonic 2nd edition, Glory is Fleeting, OATHMARK: BATTLES OF THE LOST AGE, Rangers of Shadow Deep, Black Powder, Bolt Action and BATTLETECH.
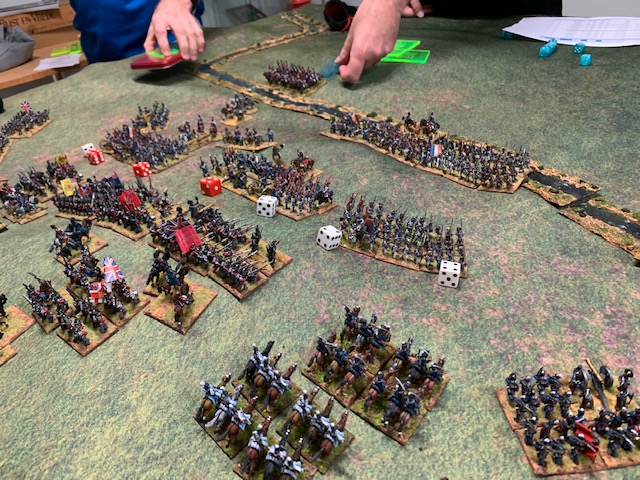
My 4th Field of Glory Napoleonic (2nd edition) battle was a 3vs3 refight of the Battle of Talavera of the 28 July 1809.
Can the French change history, or will they come up the same old way and be beaten down the same old way...
The Start of the battle. Not to scale.Done with Battle Chronicler, which I cannot work out how to place more than 1 unit. Im aware the North/South direction is wrong for the historical battle, but it's easier for me to rembember tha North is Up.
Some really good pictures taken by RICHARD GORDEN can be found on Facebook
Being Spain and with Lieutenant General Sir Arthur Wellesley in command and choosing the ground to fight., the entire battlefield was counted as difficult terrain for Artillery and Cavalry to move. There were 3 small rough hills were to the west and a large gentle hill in the centre that Wellesley placed his 3 English army divisions on the reserve slope (as was his want).
Special rules for the scenario are that cavalry and artillery moves as if the table is all difficult terrain.
To the large hills right in the plain was MY SMALL(unhistorical) PORTUGUESE DIVISION consisting of a large infantry brigade with skirmishers and a small brigade with attached artillery, with a skilled commander.
In the town of Talavera itself was a large Spanish army of several divisions, with a light brigade in the farm next to it. Behind the town was a large division of suspect Spanish Cavalry.
Behind MY SMALL PORTUGUESE DIVISION was the 1st KGL Hussars, Impetuses British Light Dragoons, British Heavy Dragoons (commanded by Lieutenant General William Payne) and a further division of suspect Spanish cavalry.
Wellesley placed himself on top of the hill. Captain Richard Sharpe was to his right near MY SMALL PORTUGUESE DIVISION.
A small Spanish unit was placed in THE SPANISH REDOUBT in the centre. It wasn't expected to do much, but delay and maybe disrupt the TWO FRENCH Divisions attacking it.
Marching to the sound of the guns was the BRITISH LIGHT INFANTRY DIVISION - the famed 95th Rifles. Would they make it in time?
The FRENCH ARMY consisted of three corps, each of several infantry divisions and heavy cavalry. They also had some artillery brigades mixed in with the infantry. The French heavy cavalry was mostly on the French left wing with a long line of infantry shouting VIVA LA EMPEROR going across from the farm to the English hill (the French generals actually said VIVA LA something else but I didn't get the joke).
A stream crossed across the battlefield, though petered out nearer the town. it counted as difficult terrain, though near my division it only acted as a defence line bonus.
Most (all?) of the figures are provided by RICHARD GORDON, co-writer of the 2nd edition rules. He also created the scenario and acted as referee. The buildings were made by Eureka Miniatures, though sadly I don't think they make them any more.
The Anglo-Portuguese army. Talavera is off in the distance to the east.
The British army deployed on the reverse slope of the hill, so were out of sight before the French deployed. MY SMALL PORTUGUESE DIVISION was to the right of it, and then the Spanish army continued into to the town. A division of light infantry defended the Orchard.
The British and Spanish Cavalry divisions.
MY CAVALRY DIVISION setup in reserve behind my Portuguese units and in the reverse slope of the hill.
MY SMALL PORTUGUESE DIVISION. A small brigade with attached artillery battery, a large brigade with skirmishers (Average, Drilled) and their Skilled general.
MY SMALL PORTUGUESE DIVISION setup with the larger brigade in front and the smaller one in reserve behind it.
British Heavy Dragoon brigade - Impetuses Heavy Shock Superior
The Impetuses Heavy Shock Superior Dragoons acted as the final reserve of the army. (They were never committed....)
Portuguese Light Dragoons. Poor Drilled.
The Portuguese Light Dragoons were attached to the British Calvary division and were ordered by Wellesley not to charge in themselves. (They did not appreciate that order).
Spanish Cavalry. Poor Drilled.
I spent the entire battle waiting for the mass of Spanish Cavalry to attack. (They never did).
British Cavalry General. Component.
The British Cavalry commander. He had to spend the battle moving between the Light Dragoons and the KGL 1st Hussar's to keep them in command range. (He ended up moving Wellesley himself out of the way to do it).
MY SMALL PORTUGUESE DIVISION facing north towards the French Army.
The French army deployed nearly identically to the actual real world battle. Would history repeat itself?
The town of Talavera. Spanish divisions defend it and the attached orchard. Most are poor, drilled. The brigade to the left is a Guards unit.
I was surprised that nearly the entire Spanish army deployed in town with few reserves. The Spanish general in command commented that he did not have high hopes for their morale for the coming battle or that he would advance out of the town to the attack.
The Anglo-Portuguese army. Captain Richard Sharpe is with the Rifle skirmishers on the right side of the hill. Wellesley is to his left on the hill.
I have not yet had a chance to read Sharpe's Eagle but look forward to doing so.
The allied armies, facing Talavera. Wellesley is in the centre (Exceptional, Charismatic Corps Commander)
I am somewhat annoyed that you cannot get a British exceptional corps commander in the army list UNLESS he is also charismatic! I know Wellington was good but do I really have no one else who is really that good in his entire army??
The French right advance to towards the river. 3 infantry divisions with artillery brigades.
Seeing the massed French infantry divisions and attached artillery made me very worried. My part of the army was quite small compared to the mass of trained veteran infantry bearing down on me.
I think most were Bavarian? The French generals made a joke about it. We were deliberately told that we couldn't find out what the enemy units were or their skills. However, Richard's army was so well painted and chosen it was pretty obvious what was what. And it didn't really matter to me how good they were, they still died the same way as poor bloody conscripts.
Behind the right wing corps is a heavy dragoon division.
The French heavy dragoons did the same thing my heavy dragoons did- act as the army reserve. Neither unit actually did anything in the entire battle...
On the French centre, two infantry divisions deploy towards THE SPANISH REDOUBT (Poor, drilled).
It was probably a mistake, but I convinced Wellesley and Spanish general to deploy a throw away unit in the redoubt, We knew (but the French did NOT) that the LIGHT DIVISION was marching towards us, so in my view any delay was a good one. Didn't end very well for the conscripts through...
The French left wing facing Talavera. A large amount of calvary.
The French army deployed nearly exactly like their historical battle line. Their Dragoons were clearly just there to stop the Spanish coming out into the open. IMHO, the Spanish should have come out, apart from the Dragoons the right flank was wide open...
The French right wing corps advances and starts to cross the river. Wellesley watches calmly.
We could have defended on the river, but Wellesley wanted to defend from the top of the hill. Gee, you could even think he'd seen this all before...
Two French Divisions attack THE SPANISH REDOUBT.
3 Brigades to 1 poor one isn't going to end well. And we had northing to support it. I should probably have had one of the light cav units nearby to at least force them to deploy more.
The Spanish barely slow the attackers down, wavering one unit.
The return fire disorders them!
I was not impressed by the Spanish performance. I can see why Wellesley wasn't either.
Wellesley looks down on the approaching French army.
British Infantry on the ridge.
I wish one day my figures would as look as good as these do!
The French right corps crosses the river without incident.
I was telling Wellesley he should let my cavalry go forward to delay the French as they slowed down to the cross the river, He denied it.
The Spanish General makes a desperate race to raise the spirits of the trapped garrison but is too late!
The general might well have rallied them if he was closer, though he also may have died in the rout that was going to follow it.
The French storm the redoubt and there are no survivors! The French brigade is only disordered.
Did I mention I dislike the redoubt rules? Apparently it's a literal hangover from the 1st edition where they were too powerful.
Aginast orders, the Spanish left wing advances to the river. MY SMALL PORTUGUESE Division matches their line...without orders either.
The umpire was quite clear (after the battle started!) that the Spanish and Anglo-Portuguese could NOT communicate their plans or advice to each other. I probably directed too many comments to the Spanish general, but as far as I can tell, he ignored all my ideas anyway (which was a good idea). I just let them move first and tried to follow their lead.
The French corps of three divisons advances up the hill towards the silent British line.
Seeing 3 large French Divisions advance made me very worried. If they kept their line and stopped us out flanking them, they would surly defeat the British thin red lines.
I asked why they weren't advancing in column formation and was told it's "tactical" and counted as such. (I disagreed and thought they should be in a more deep formation, but the rules allow it).
The French left attacks the Spanish light division in the orchard.
I was surprised to hear the Spanish HAD any light infantry, I thought they were all unreformed. I thought it was the best place for them, as they were acting as THE HINGE (see my post about that).
The French right corps deploys to advance up the hill.
A full division in reserve.Though I think they made a misstep here NOT being in a deeper formation. They should know they may not win in a fire fight with British troops, and they have the reserves to throw in if they need them...but only if they can fit through. And being in a wide tactical formation makes that harder.
Wellesley moves a division to outflank the French right wing.
And here we see the historical outcome! In the real battle the Impetuses British Dragoons tried to outflank the French infantry and charged straight into a ravine and then into French cavalry and got cut to pieces. In this battle, the French had NO cavalry on their far left (our right). I couldn't move my light dragoons that far fast enough and keep them in coherency with the rest of the division, so they stayed in the centre of the British support line. You can see some French cavalry moving right in the background, but they never reached the far end before being needed...elsewhere.
I move my Impetuous BRITISH LIGHT DRAGOONS to support the main British line.
This is as far as as my Impetuous BRITISH LIGHT DRAGOONS got in the battle.
My PORTUGUESE DIVISION moves up with the KGL Hussars and Portuguese cavalry in support.
I felt the need I HAD to go and try and outflank the French attacking the British hill. I wanted to go in with all the cavalry but Wellesley said I was going too far forward and ordered me back a bit.
My PORTUGUESE DIVISION prepares to engage the enemy.
Time to roll some dice.
With no infantry on the French left wing, the Spanish divisions advance out of their defences towards the French Calvary,.
The Spanish General listened to my advice (or probably more accurately decided now was the time himself) and started to move out of the town. It took a long time to do it...I don't know if they ever got close enough to the French to actually shoot them.
The French right corps prepares to attack the British line. My PORTUGUESE DIVISION and the KGL are in position to flank them.
Wellesley kept telling me to hold back, "it's often more important to know when not to commit as it is to know when it is". He was correct, in that the French were unharmed at this point and if advanced too far forward I'd be outflanked myself, and the French had better troops and heavier guns than I did.
Each dice is the amount of gunfire coming from the allied line.\
The British shooting was completely rotten, and despite the massed gunfire, failed to do much of anything for 2-3 turns! Wellesley blamed the smoke.
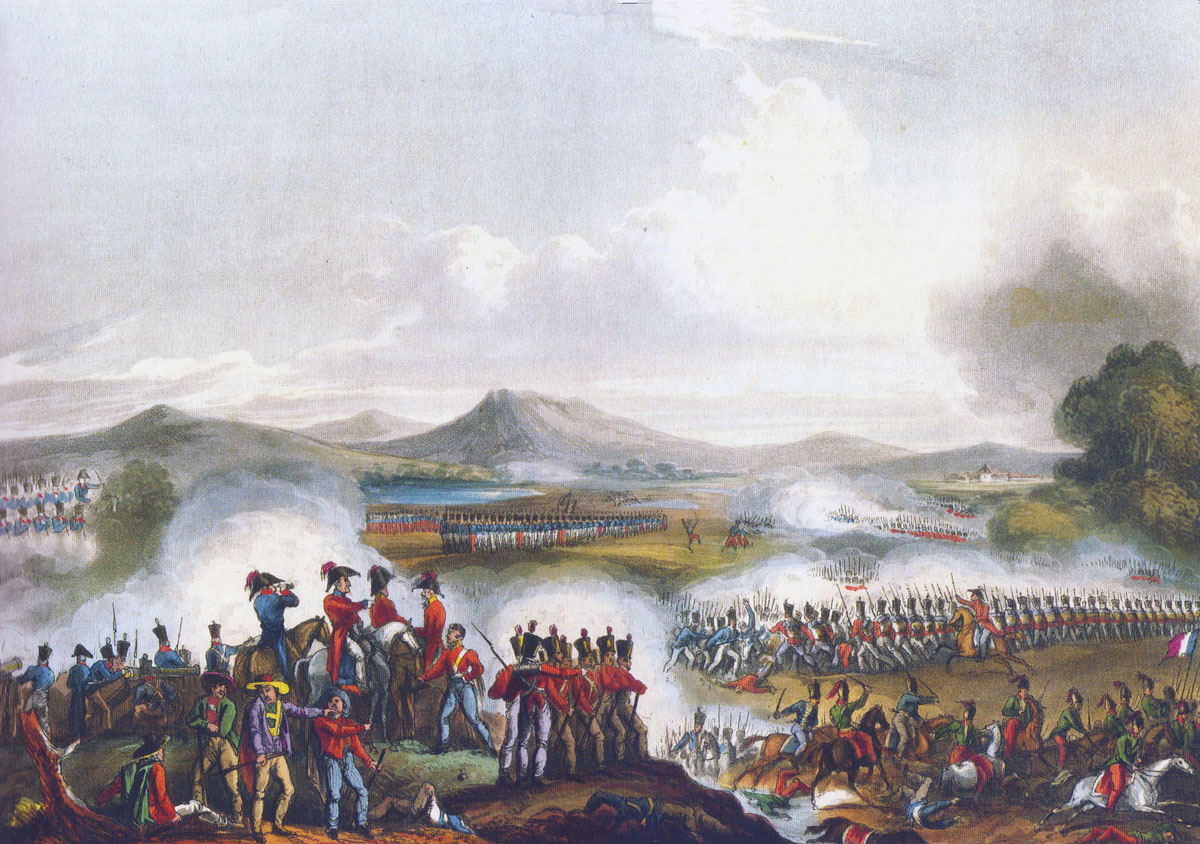
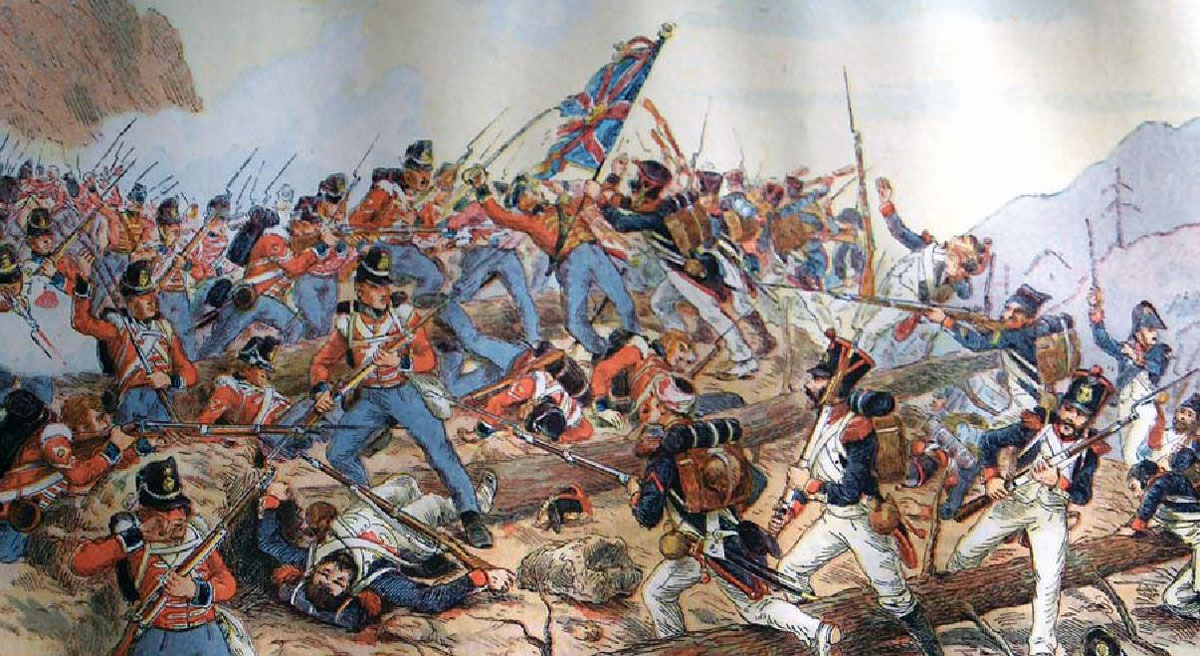
Battle of Talavera on 28th July 1809 in the Peninsular War: picture by JJ Jenkins - Britishbattles.com
French gunfire in the centre.
There was a lot of French fire coming my way, but a lot of it was ineffective, which I was surprised to see.
PREPARE TO FIRE!
Musketry and artillery open fire! My small brigade begins to waver! The French units to my front are also impacted.
This is probably why Wellesley was telling me not to advance too far. I was very lucky my large brigade didn't take enough damage to hurt it!
The British army starts to flank the French right wing which is forced to fall back.
This was the starting point of big problems for the French army. They had nothing to stop it, except the heavy dragoons coming up...too slow.
The French centre takes heavy casualties. The Spanish left wing is also wavering. The Spanish Guard to the right of the picture is only disordered.
Our original plan had been to lure the French into a hinge in the centre, but the Spanish advance had foiled that. However, the plan had worked here through some lucky shooting on our part.
THE DECISIVE MOMENT. Against orders from Wellesley, the KGL HUSSARS CHARGE!!!!!
Wellesley really didn't want me to charge in, but I kept thinking THIS WAS THE DECISIVE MOMENT. The French were disordered and I might not get another chance. NOW WAS THE TIME! GO FOR IT KGL! HUZZAH! I also had flank AND rear support from the Portuguese cavalry.
My SMALL PORTUGUESE DIVISION does heavy damage to the French centre.
At this point off camera, the cloud of dust that been on the horizon finally arrived! Our reserves had got here in time!
"Is that it?!" I exclaimed. "Yes. That's the British Light Division". "It's ONE SMALL BRIGADE?!!" "Well yes, but they are the best unit in the army, light veteran superior troops". "I was expecting...something bigger".
I think the French generals were just as surprised as I was to see this huge dust cloud arrive and out walk 4 stands of green infantry.
The Portuguese Calvary move up to support the KGL in their death ride.
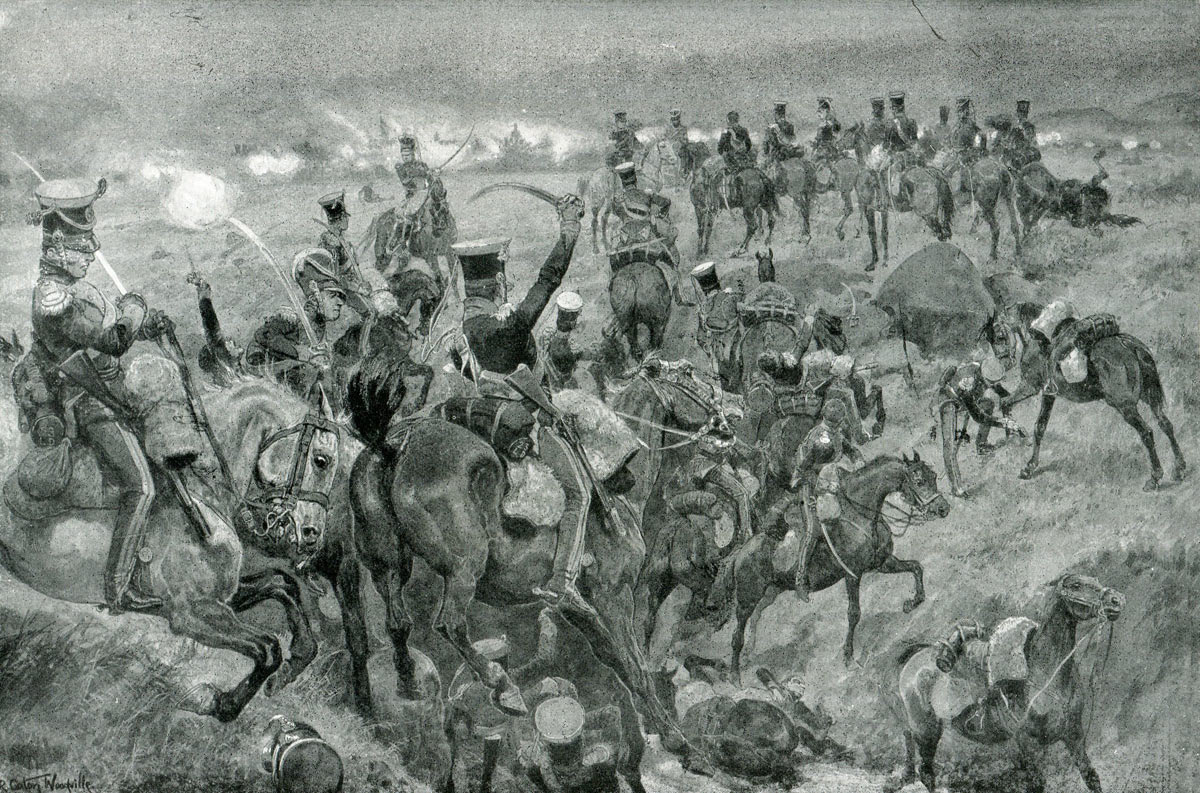
23rd Light Dragoons attacking the French infantry squares at the Battle
of Talavera on 28th July 1809 in the Peninsular War: picture by Richard
Caton Woodville (the regiment is, in error, it was actually the KGL light dragoons!) - britishbattles.com
It's not really a death ride if all the French shots MISS and you have flank and rear support.
MAXIMUM DAMAGE. EVERY ATTACK DICE BY THE KGL HITS! THERE ARE NO SURVIVORS!
I was amazed that worked, but work it did.
THE KGL ROUT PURSUE AND ROUTE AN ENTIRE FRENCH DIVISION TWO BRIGADES FLEE!
They went on to cause a cascade failure and destroyed a SECOND brigade behind the first. Due to the terrian for some reason, infantry could not form square when charged. Wellesley was a god-damn genius on picking his ground to fight on. For some reason I'm not sure of, the French heavier cavalry never tried to charge our infantry.
French heavy dragoons counter charge the spent KGL. The supporting Portuguese cavalry change in to intercept them!
At this point we worked out that the entire French army had taken nearly > 30% routed and wavering units AND we'd taken less than 10%. If we took no more damage the battle would be over. I hadn't actually NEEDED the unit to flank cover my KGL cavalry, so intercepting the heavy dragoons with my poor light dragoons was probably not a good idea. However, he would have changed into the flank of my spent KGL Hussar's instead, so I considered a better trade.
A French infantry division is so shaken by these events THEY MISS EVERY SHOT. The Portuguese fire back and HIT WITH EVERY SHOT! The French centre is wavering!
3 French infantry briagdes took every shot they could AND MISSED. I shot back at all 3, and got hits with 2 dice ON EVERY ONE. 50/50 chance to hit!
On the allied left wing, the British army changes home and routs multiple units! They came up at us in the same old way and we defeated them in the same old way!
While this was going on, the British army had won ONE fire fight early on, 3 dice to a French 4. That allowed them to rout a single French brigade...which then allowed two British units to shoot every single one of the French ones. The damage became insurmountable and cascade failures started to happen along the entire French right wing!
The French centre is battered and about to collapse.
Lieutenant Sharp goes for a French Eagle (the 95th rifle skirmishes to the right of the picture).
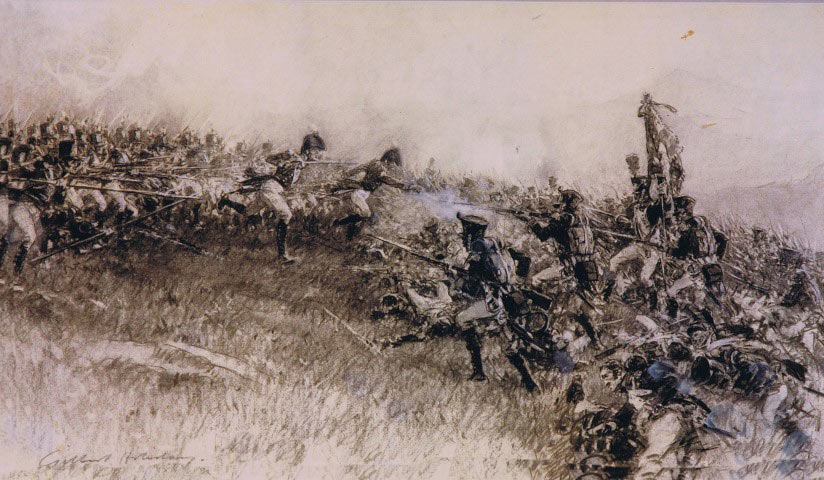
29th Regiment attacking the French at the Battle of Talavera on 27th/28th July 1809 in the Peninsular War - britishbattles.com
I'd asked where Captain Richard Shape was, and he was right where he needed to be.
The British army charges home! They only need 4 hits and did 12!
Sean Bean does NOT die this day! I blame him for that dice roll.
The French right wing collapses and entire divisions flee the field! Sharpe captures an Eagle!
Attack of the British 29th Regiment at the Battle of Talavera on 27th/28th July 1809 in the Peninsular War - britishbattles.com
I'd just moved the KGL behind the French right wing and was looking forward to getting some rear charges but they collapsed before I could do it.
The French right wing disintegrating and the centre wavering. The French left wing has driven back the Spanish from the orchard and routed two units, but it is not enough. The entire French army breaks and flees the battlefield! Viscount Wellington of Talavera is proclaimed!
After being told I couldn't talk to the Spanish, I didn't pay much attention to the battle to my right, which isn't very fair to the Spanish general. His poorly trained and low morale units held off the Veteran French long enough for the British Infantry and German cavalry to do what they needed to, and I think only two out of 16 Spanish units were broken. I don't think the French cavalry on the right did anything meaningful in the battle, which was a big win for us. They got driven back across the near the entire battlefield without doing anything for their high cost.
J\ust off camera THE FAMED LIGHT DIVISION is moving up to help the Spanish, but they never did in time. Completely historical outcome for that too.
The remnants of the fleeing French units rout off the field of battle, leaving their guns to be captured. French cavalry stays back as a rear guard.
I should have got a shot of the entire battlefield but I missed my chance as I was in a somewhat shock that we'd won.
ALLIED VICTORY
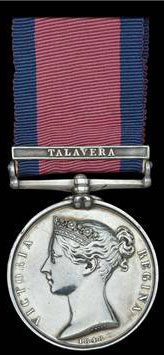
Military General Service Medal awarded to Captain Hawker with clasp for
the Battle of Talavera on 28th July 1809 in the Peninsular War - britishbattles.com


No comments:
Post a Comment
Thank you for the comment on my blog! May your dice never desert you and your tactical abilities be as good as your posting is! Never stop posting.