Darryl Cox's Austrian Infantry army attacks the Lines of Torres Vedras
League of Ancients January 2021 Field of Glory Napoleonic tournament. Battle #2
 |
| Wellington
looks toward the Austrian Army, and places his battalions with care.
One of the redoubts with Portuguese Militia is to his right. |
Following his first failed attempt to breach the first line of TORRES VEDRAS in SOUTHERN PORTUGAL before nightfall, EMPEROR NAPOLEON has sent one of his Marshall's forward with a large AUSTRIAN CORPS of infantry, cavalry and artillery to attack elsewhere on the line.
The VISCOUNT LORD WELLINGTON has placed his defenses on top of two hills and entrenched his troops to defend a road that leads towards LISBON.
Will the huge mass of Austrian infantry overwhelm the thin red line on the ridge, or can the British IMPETUOUS HUSSAR LIGHT BRIGADE lead a charge to GLORY or be a charge to their armies DOOM....
 |
| Looking north from the hill with the two redoubts, towards the Austrian lines. |
The battlefield was centered on two redoubts built as part of the Lines of Torres Vedras, north of Lisbon. Napoleon could not remove the last English army from the continent until it was taken. Portuguese Militia occupied the left western one, Portuguese Line Infantry the right eastern one.
To the north west was a small farm, and to the direct west a small village. Both area's had been fortified into strong-points as part of the defence line.
A large vineyard was to the rear of the hill, and was very difficult terrain to cross. Cavalry and artillery would find it near impossible to move through towards the defenders line of communication if they approached it from the east.
A small rough field was to it's north, and a small rise and forest were near the Austrian army form-up area. Several roads crossed the area.
Intelligence indicated that the Austrian army would be attempting an ENVELOPMENT attack on one or both flanks.
 |
| The Anglo-Portuguese (with Spanish, German and Scottish troops) formed up early. |
The Allied army deployed in a longer than normal arc. A lack of a river to defend one flank was thought to be a mistake, but at least the vineyard covered one flank, and the western village the other. I decided to defend the left side with the LIGHT DIVISION as it was my most vulnerable, and the strong-points were on that side. The FIRST DIVISION defended hill redoubts and stayed hidden on the reverse slope of the hill. The CAVALRY DIVISION was in reserve, south of the east-west road and close to the LINE OF COMMUNICATION.
 |
| The famed LIGHT DIVISION defends the left flank. |
The Light Division was conceived as the flanking unit of the army. While the first division would HOLD the enemy, the Light Division would attack on the flank and use the movement and firepower to cause damage. This was the first battle I've played where that plan actually worked....
Spanish Guerrillas occupied the western town. The strong-point to the north was defended by the Loyal Lustrian Legion with it's attached artillery battery. Between the two fortified building areas the 95th Rifle's were in extended line. The Division reserve was a superior elan Highlander infantry unit with skirmish attachment.
If the enemy attempted to envelope my left flank, the light troops would hold them off in the strong-points while the cavalry would come to their support.
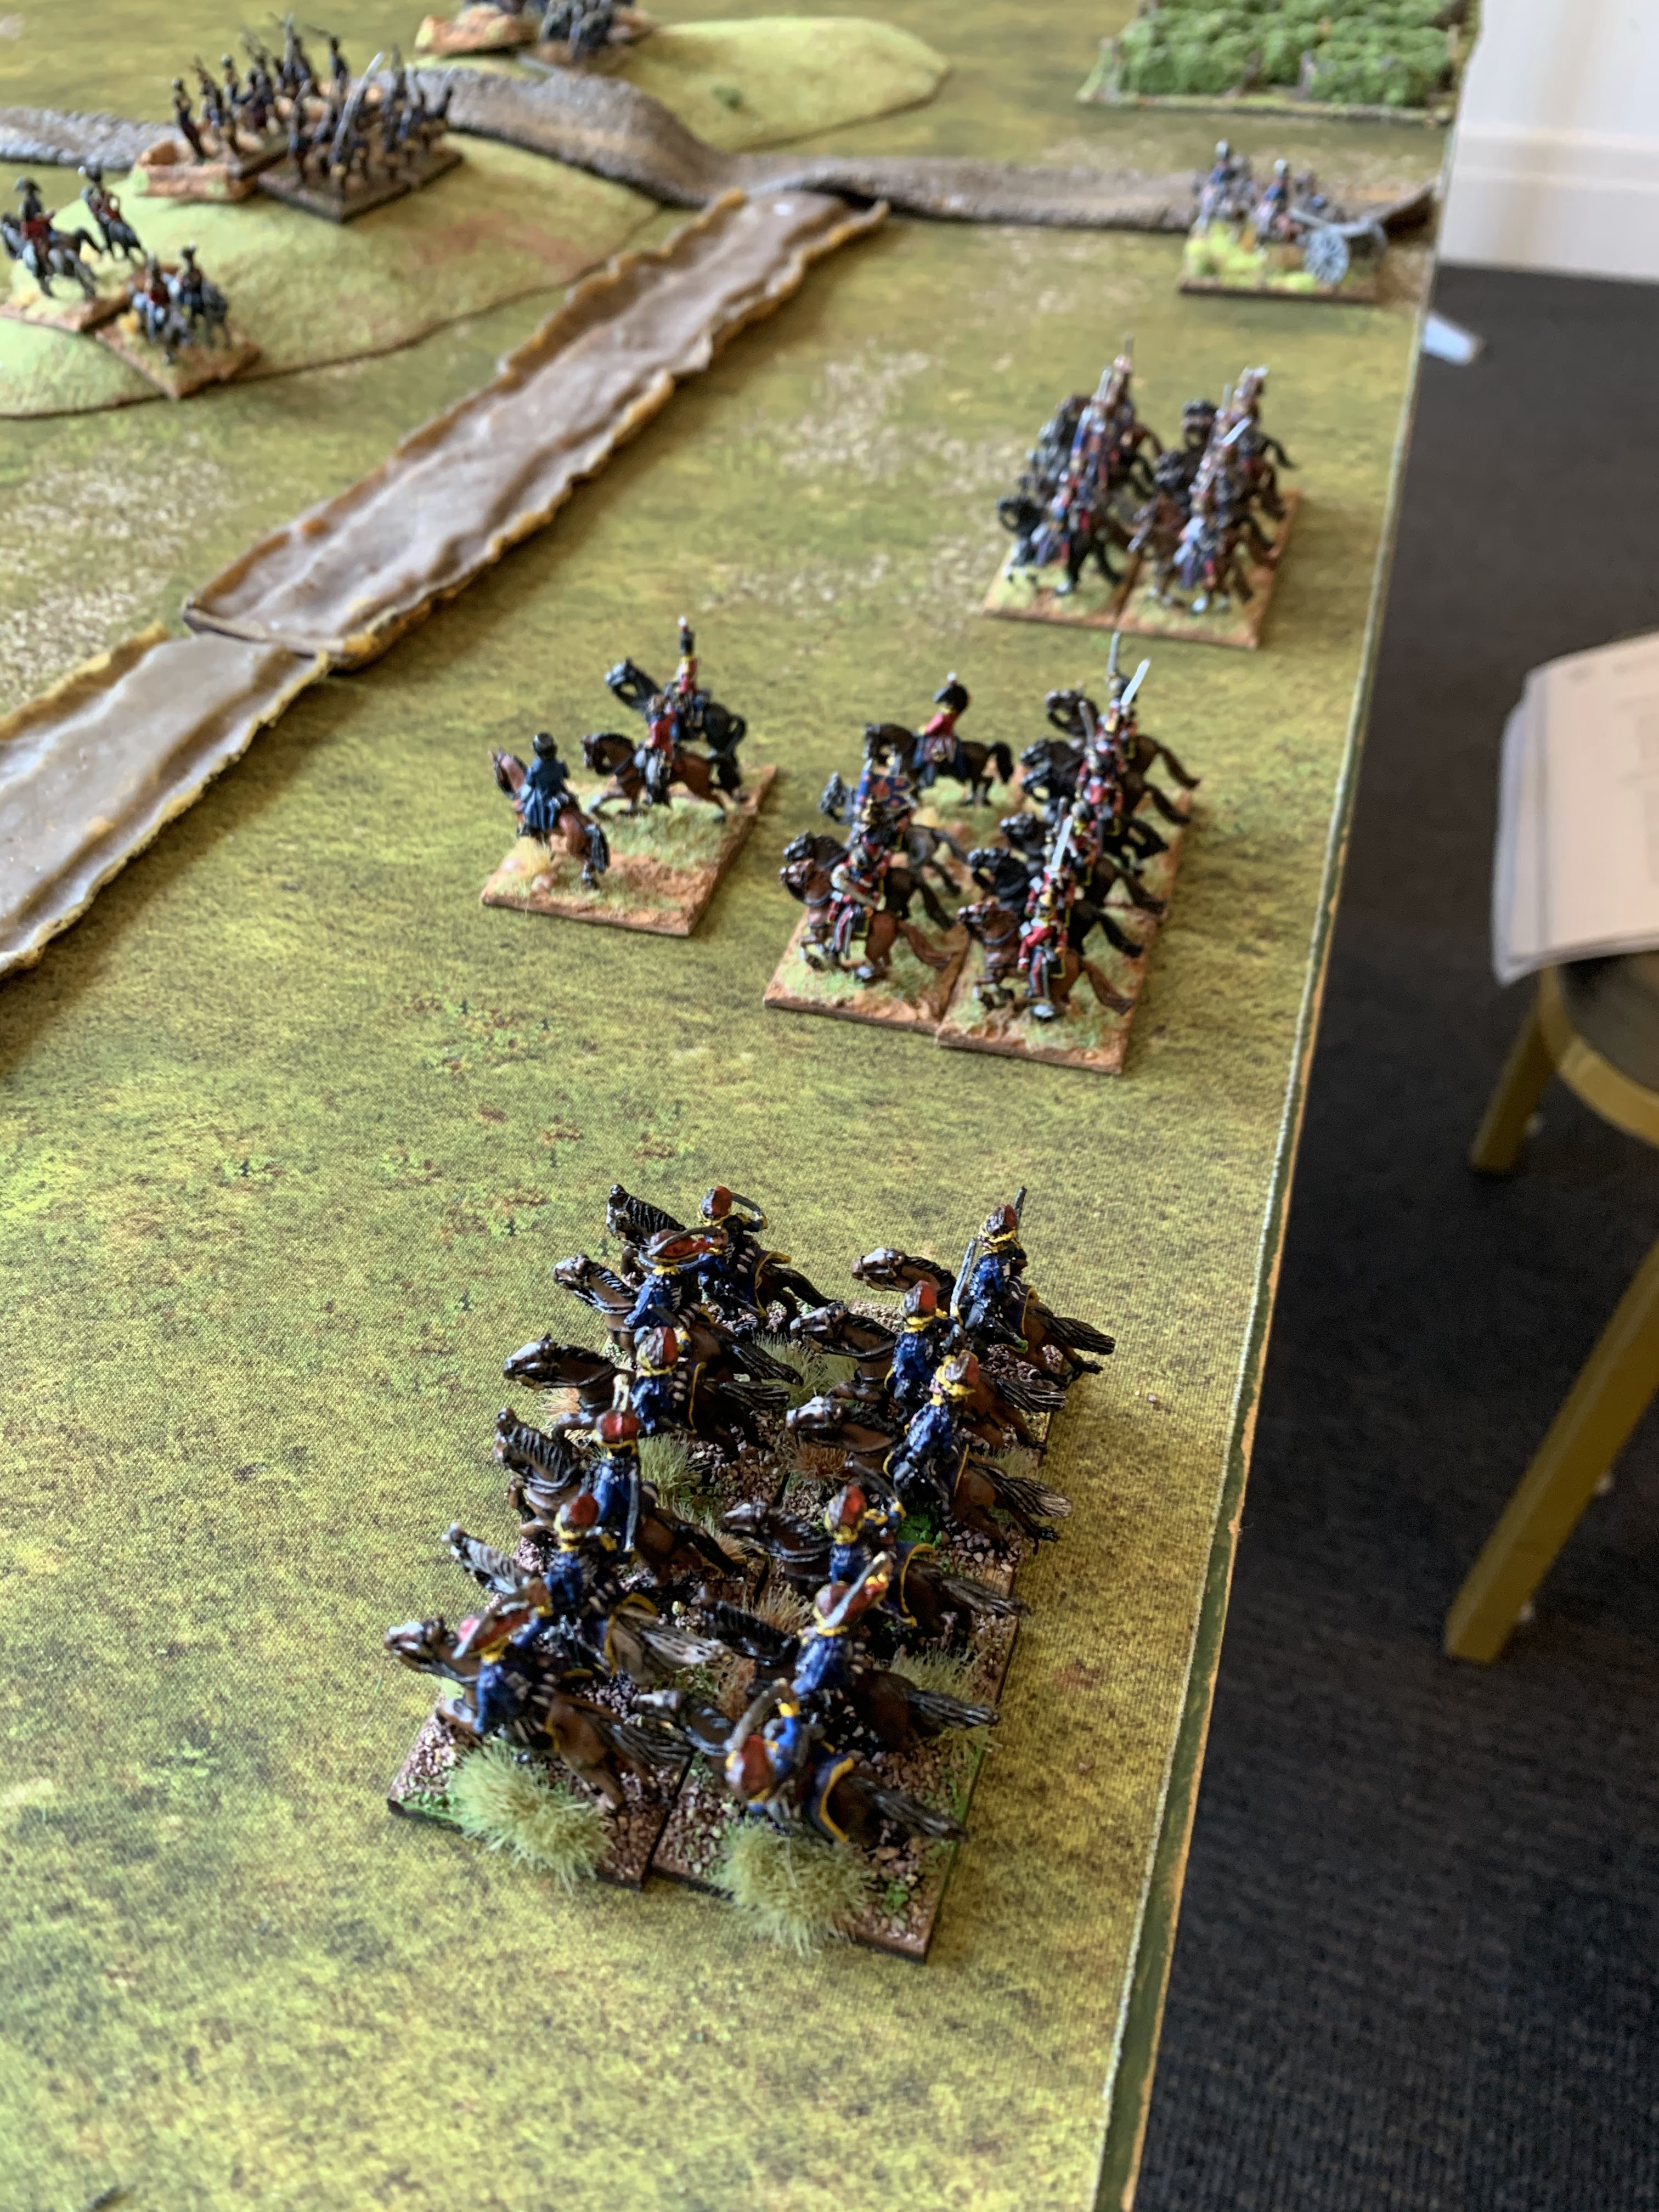 |
| The Calvary division in reserve. |
The Cavalry division was made of a unit of IMPETUOUS BRITISH HUSSAR'S to the west (closest to camera), a unit of IMPETUOUS HEAVY DRAGOONS and a unit of (poor) Portuguese Dragoons (furthest from the camera).
 |
| The Line of Torres Vedras redoubts covered the road juncture and line of communications. |
A Portuguese Militia unit held the left side, and a Portuguese Line infantry unit the right. The other units of the division, remained hidden on the reverse slope of the hill.
 |
| Lord Wellington stands on the hill waiting for the attacking corps to arrive |
Placing the Corps commander on the hill tactically didn't make much sense,. but it was THEMATICALLY IMPORTANT DAMMIT. So starting on the hill in full view of the enemy he did.
 |
| THREE Austrian Divisions move forward. |
Three Austrian divisions moved onto the battlefield. A small cavalry division guarded the western flank. Two infantry divisions advanced together in Austrian Doctrine, in one solid block.
 |
| Austrian Heavy and Light Cavalry, |
The left unit was a SHOCK HEAVY CAVALRY Brigade, with attached Brigade Commander AND Horse Artillery battery, making it the most powerful unit on the battlefield. The gun battery made it superior to my own SHOCK HEAVY DRAGOON unit. The Hussar unit was not as good as the British Hussars from Bad Cav Island, but were not IMPETUOUS.
 |
| Middle Austrian Infantry Division |
The smaller infantry division had attached artillery and skirmishers, but was UNREFORMED, meaning they had no inbuilt light infantry companies in the battalions and attacked in slow lines, rather than the French thought of attacking in faster column. Therefore, they had a large drop in firepower compared to British and Portuguese Line units with their dedicated light companies and attacked light battalions firing in two lines instead of three.
 |
| The larger Eastern Infantry Division |
The right flank Austrian infantry division was larger, and I suspected the Austrian envelopment division would be coming to support it on my far right flank, probably with a lot of cavalry.
 |
| The Austrian camp and line of communication |
I was highly unlikely to be able to reach it, though the Spanish Guerrillas would like to think they could have made it.
 |
| With the Austrians deployed, the reminder of the FIRST DIVISION is reveled behind the hill. |
It was made up of two large Infantry Brigades with attached artillery batteries and light infantry companies. A third smaller unit of Highlanders with superior elan was the division reserve.
 |
| As the Austrians advance, the allied army moves to refuse the flank and block the gap between the redoubt and vineyard. |
I suspected the last enemy division would be coming to my right flank, so moved the cavalry and light division up to attempt to flank the attacking enemy, while the First Division would hold the hill with the Portuguese dragoons in support.
 | |||
| The redoubt militia in top hats look towards the advancing Austrian Infantry. |
 |
| THE CAVALRY ARRIVES |
As expected, but sooner THAN expected (they arrived the first turn they could), a large Austrian SECOND CAVALRY DIVISION appeared on my far right flank.They were obviously going to attack my Line of Communication.
 |
| The Infantry attack gets into position. |
As they approached the eastern redoubt, the Austrian infantry split up and moved towards the base of the hill. They did NOT move to directly assault the hill...which vs British Trained Infantry on a ridge line...was probably not the best battle plan. I believe the Austrian general had never actually attempted to attack British troops on a ridge line.
 |
| The East Cavalry Division advances to match the infantry line. |
 |
| The Austrians pause to firm up their line of battle. |
The Vineyard now showed it's use. It served to completely block the enemy cavalry from getting behind my lines, and the infantry between it and the redoubt could form in DEEP TACTICAL FORMATION and be very difficult to force out. And the Austrian shooting was going to be less powerful vs British Line with artillery and skirmish attachments...
 |
| The Allied army forms a Hinge. |
With good terrain to fight on, I moved the Light Division and cavalry to positions to flank the enemy Corps. The Highlander units moved to fill in the gaps with the Portuguese dragoons as the final reserve for the defence line.
 |
| The Unreformed Austrians attempt to win a firefight with British trained infantry and light infantry backed up by artillery. |
At this point, two infantry divisions were attempting to engage a Highlander unit between the two redoubts, the Portuguese in the redoubt and two large British infantry brigades on the hill. Those of you who know your history, can foresee how this will turn out for the Austrian's. The Austrian's should have moved to close range as soon as they could, a lesson they would learn too late.
In front of the left most redoubt, the IMPETUOUS HEAVY DRAGOONS moved to a position to charge the Austrian left cavalry division. The IMPETUOUS BRITISH HUSSARS were behind them, with the Rifle Brigade in a position to support the Highlanders.
 |
| CHARGE!!!!!!!!!!!!!!!!!! |
The IMPETUOUS HEAVY DRAGOONS charged and were themselves intercepted and counter-charged by the Austrian HEAVY SHOCK CAVALRY.
 | |||
| The right flank Austrian Cavalry is stuck between a hard redoubt and rocky vineyard. |
On the far right flank, the enemy infantry attack was getting nowhere. Out shot by British trained infantry and not able to maneuver between the redoubt and vineyard, they were unwilling to get closer.. The cavalry that did to get close fell back after taking damage from British muskets and artillery.
 |
| As the heavy cavalry fight, the infantry decide attacking the hill is not a idea they wish to partake in. |
 | |
| The Heavy Cavalry fight is a draw. |
Despite the horse artillery battery in support, the fight between the two heavy cavalry units ended in a draw. Both units were wavering and spent. The Austrian light cavalry brigade to the north east, sensed the British weakness and prepared to charge.
The Spanish irregulars were moving into a position to be behind the Austrian army and were now behind the enemy heavy cavalry.
 |
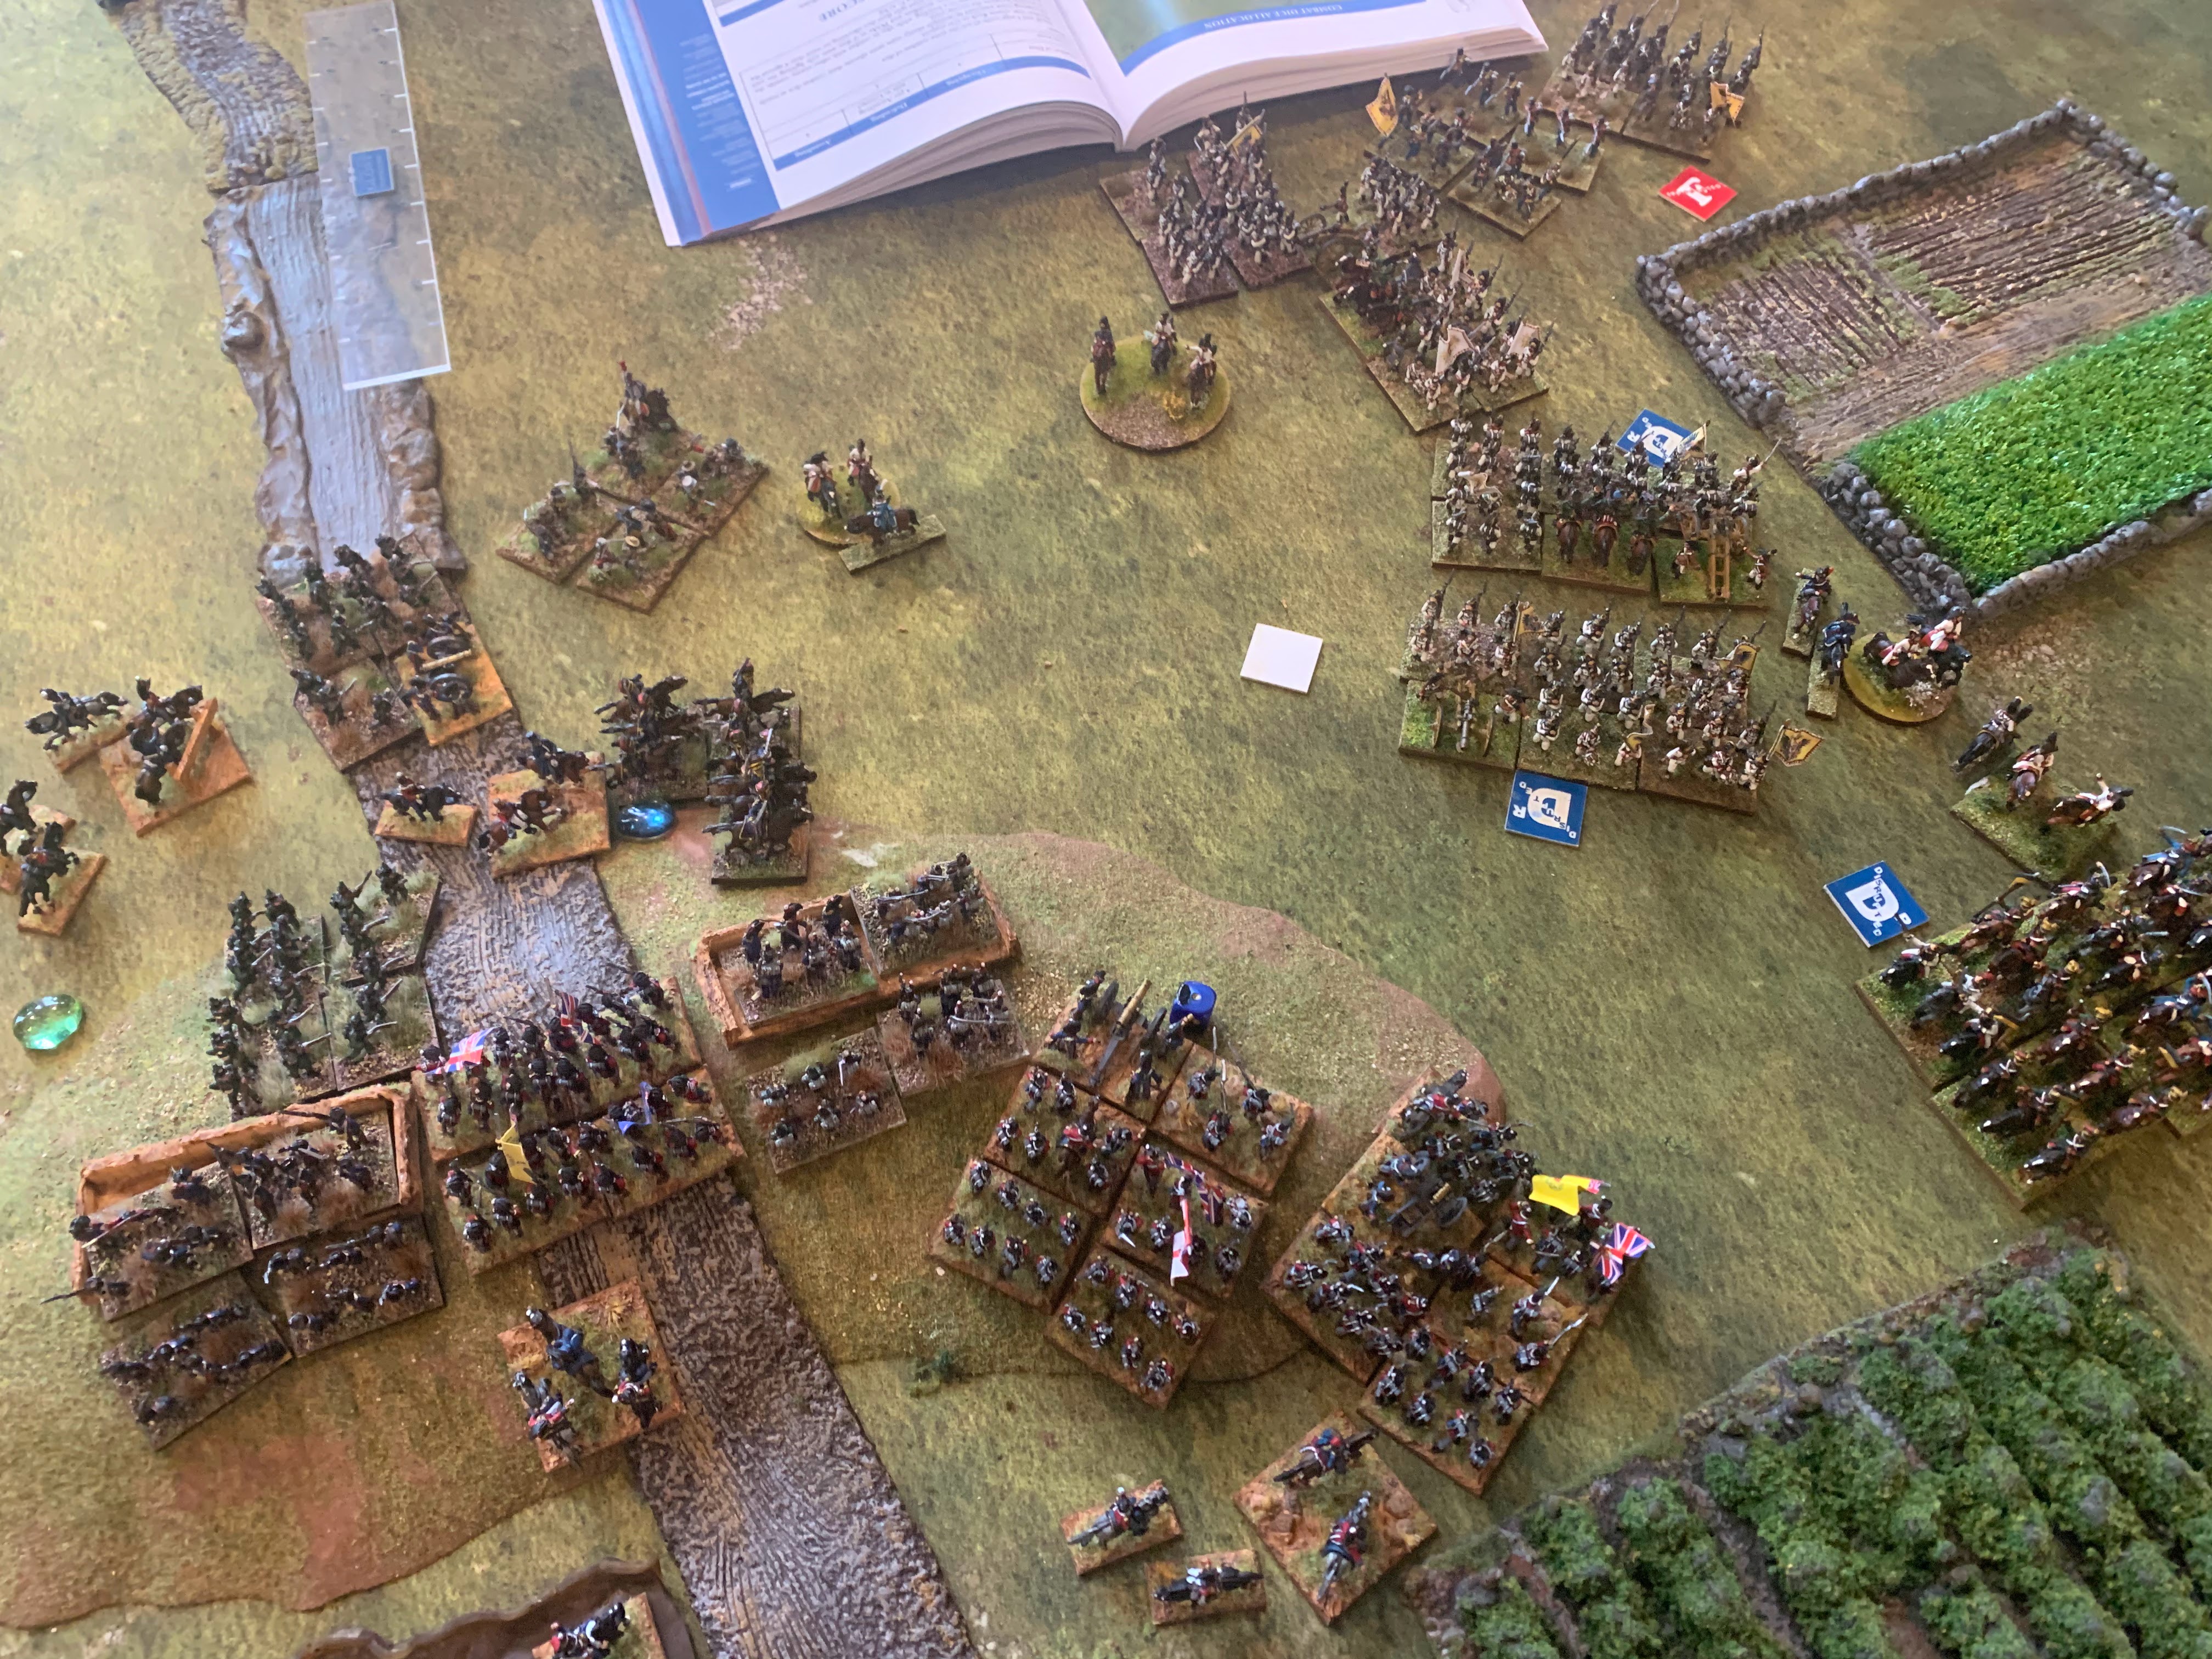
| Approaching the decisive moment of the battle! |
On the left, the Austrian Hussars charged the spent British Dragoons, weakened from their previous fight. In the centre and right, the Austrian infantry and cavalry was disrupted and out of order from the British fire and shells coming down the hill.
 |
| Get in close range went the cry! |
The Austrian infantry finally got close to the allied line to engage at close range, as the British Dragoons are charged by the Austrian Hussars on the left. However, the attacking infantry is still being disrupted by the gunfire coming out of the redoubt and down the ridge line. The Allied army is barley impacted beyond the spent and tried dragoon brigade.
 |
| THE DECISIVE MOMENT HAS ARRIVED. |
The Highlander unit on the road took too many causality's and broke as did the Heavy Dragoons. However, only the Rifle brigade was somewhat rattled and fell back. Every other unit passed their tests.
The IMPETUOUS BRITISH HUSSAR'S then charged the Austrian light cavalry in the flank. Tired and weakened from their fight with the Dragoons, they broke.
And ran into the next Austrian unit. Who saw their fellow cavalry routed, and routed too. Into the next unit. And the next. And the next. A FAILURE CASCADE ripped through three divisions of troops.
 |
| RUN! RUN FOR YOUR LIVES! THE BRITISH HUSSAR'S ARE COMING! |
The result was that 5 enemy brigades disintegrated and the remaining units were all disrupted from seeing the rest of the army fall apart
 |
| The victorious IMPETUOUS BRITISH HUSSAR'S observe the results of their charge. |
With so many units broken and routed, and only 2 allied units destroyed, the battle was over.
Anglo-Portuguese DECISIVE VICTORY
The is the first and so far only battle I've fought were all the divisions did exactly what they were designed to do. The First Division held the pinned the enemy, while the Light division flanked and the cavalry committed the decisive charge at the hinge of the enemy using the carefully husbanded reserves, to archive a decisive victory and the enemy army destroy for minimal (though not zero) causalities.
The unreformed Austrians, despite having attached skirmishers and artillery didn't have the firepower to match the British infantry units on the hill. They would have better luck I think attacking on my left where I didn't have the redoubt and hill, and attacking the strong point would use their numbers better. If nothing else, charging up the hill as soon as possible.
 |
| Final score card 21 to 4. |
No comments:
Post a Comment
Thank you for the comment on my blog! May your dice never desert you and your tactical abilities be as good as your posting is! Never stop posting.