The third attack on the Lines of Torres Vedras
(LoA Tournament game #3, Jan 2021)
Following his second failure to break through the LINES OF TORRES VEDRAS, the EMPEROR of France, NAPOLEON, has launched a third assault to break the ANGLO-PORTUGUESE army and complete his CONQUEST of EUROPE.
Losing patience with the repeated FAILURE of the subservient allies of Russia and Austria, The Emperor commits a full Corps of FRENCH infantry to launch a PROBING attack to discover a weak point in the defenders line.
Will the mass of SUPERIOR infantry, HEAVY artillery and OUTNUMBERING cavalry break the lines this time, or will the outnumbered defenders continue to HOLD THE LINES OF TORRES VEDRAS...
 |
Viscount Wellington with his ADC's and staff, observes the French advance guard from a ridge line.
|
In my third game of the League of Ancients January 2021 Field of Glory Tournament, I faced a French 1805-07 army lead by Paul Graham, who was also at his first tournament. Despite playing less games, he was much more familiar with the rules and was able to correct and help me with them several times. My apologies for getting so many wrong.
 |
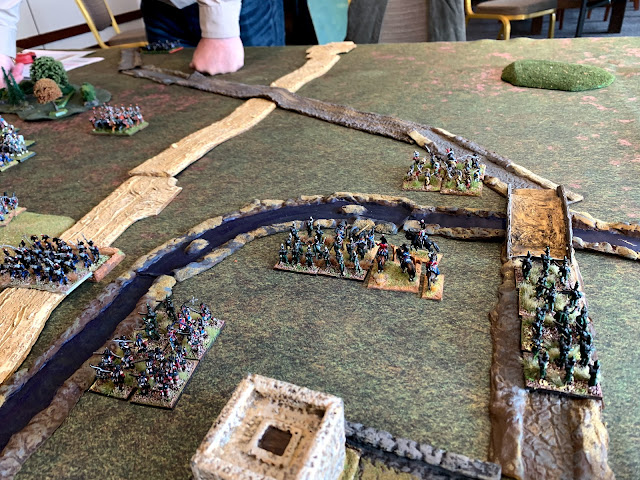
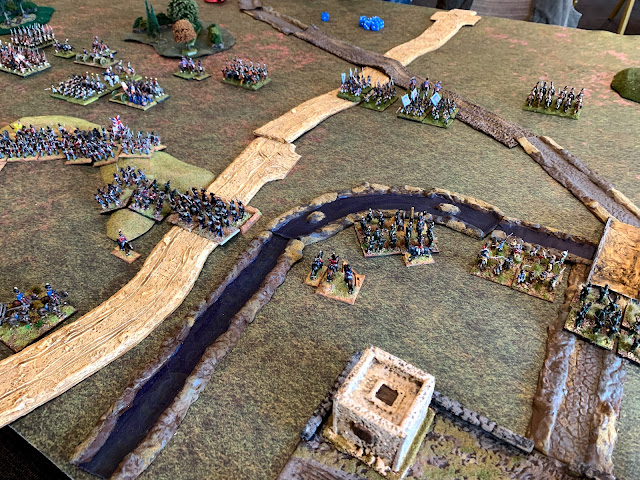
The Battlefield, facing North. The town of Torres Vedras is in the south east corner.
|
Two small ridge lines acted as the line of defence for the allied army. Two rough and very difficult to move through forests lay to the north. Two steep hills were north of the town. A river running low circled the town but was fordable in most places. The main road ran north-south.
 |
The town of Torres Vedras, looking North West.
|
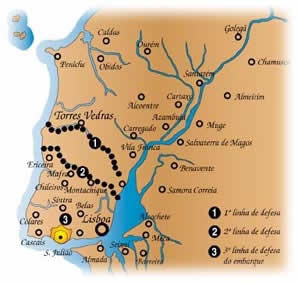 |
The location of the battle, and the area of the previous two. The attacks had so far failed to penetrate past the first line.
|
 |
The Allied army deploys into the defence line as the French vanguard approaches.
|
I gave serious consideration to just deploying my entire army behind the bank of the river but decided it would leave my line of communication to exposed on the road, even if would be defended by two redoubts and covered by flanking fire.
I could have given up the town and not split my army up, but following my experiencing vs Richard's Russians where I had done that and lost the bridge without fighting for it, I decided to put my Light Division on that side of the river. With all but 1 unit as light troops, they could cross it if needed.
The first division held the centre, and the cavalry division on the left to hold that side. I expected to be outgunned again so stayed behind the ridges.
 |
The First Division holds the centre. |
I placed the two redoubts on either side of the main ridge. The Portuguese conscripts on the left, the Portuguese line infantry on the right on the road to the LoC. Behind the ridge were two large British infantry brigades with attached skirmish and artillery batteries, and the division reserve Highlander brigade with superior elan.
Again, I did something stupid but it just looked right, and put the Corps Command right on the hill facing the enemy.
 |
The actual town of Torres Vedras.
|
The Light Division held the town. The Loyal Lustrian Legion with an artillery battery on the river corner, the 95th Rifle brigade the bridge. Behind them was the division reserve Highlander brigade with superior elan and the Spanish irregular guerrillas occupying the town.
I didn't really need to put the irregular's IN the town, but it seemed the right place to put them. I probably should have put them in FRONT of the bridge, as they were the only unit I had that can move out of my deployment zone. In fact I now think I should have put them on my far left flank and moved them into the forest there. My handling of the these troops has been poor all tournament.
 |
| The Cavalry Division in brigade formation. |
|
This time I remembered to put all the cavalry in one brigade formation for ease of movement. What I still should have done is put the heavy Dragoons with their own brigade commander off by themselves and had the division commander move the light cavalry units separately.
 |
Watching and waiting for the French assault.
|
Corps Command started on the hill again. Wellington did this deliberately several times in real history and it actually worked to slow or prevent a French assault! French Marshal's had a complex about seeing Wellington on a hill and assumed his entire army would be lurking behind it every time.
 |
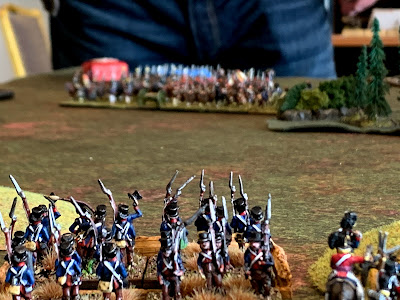
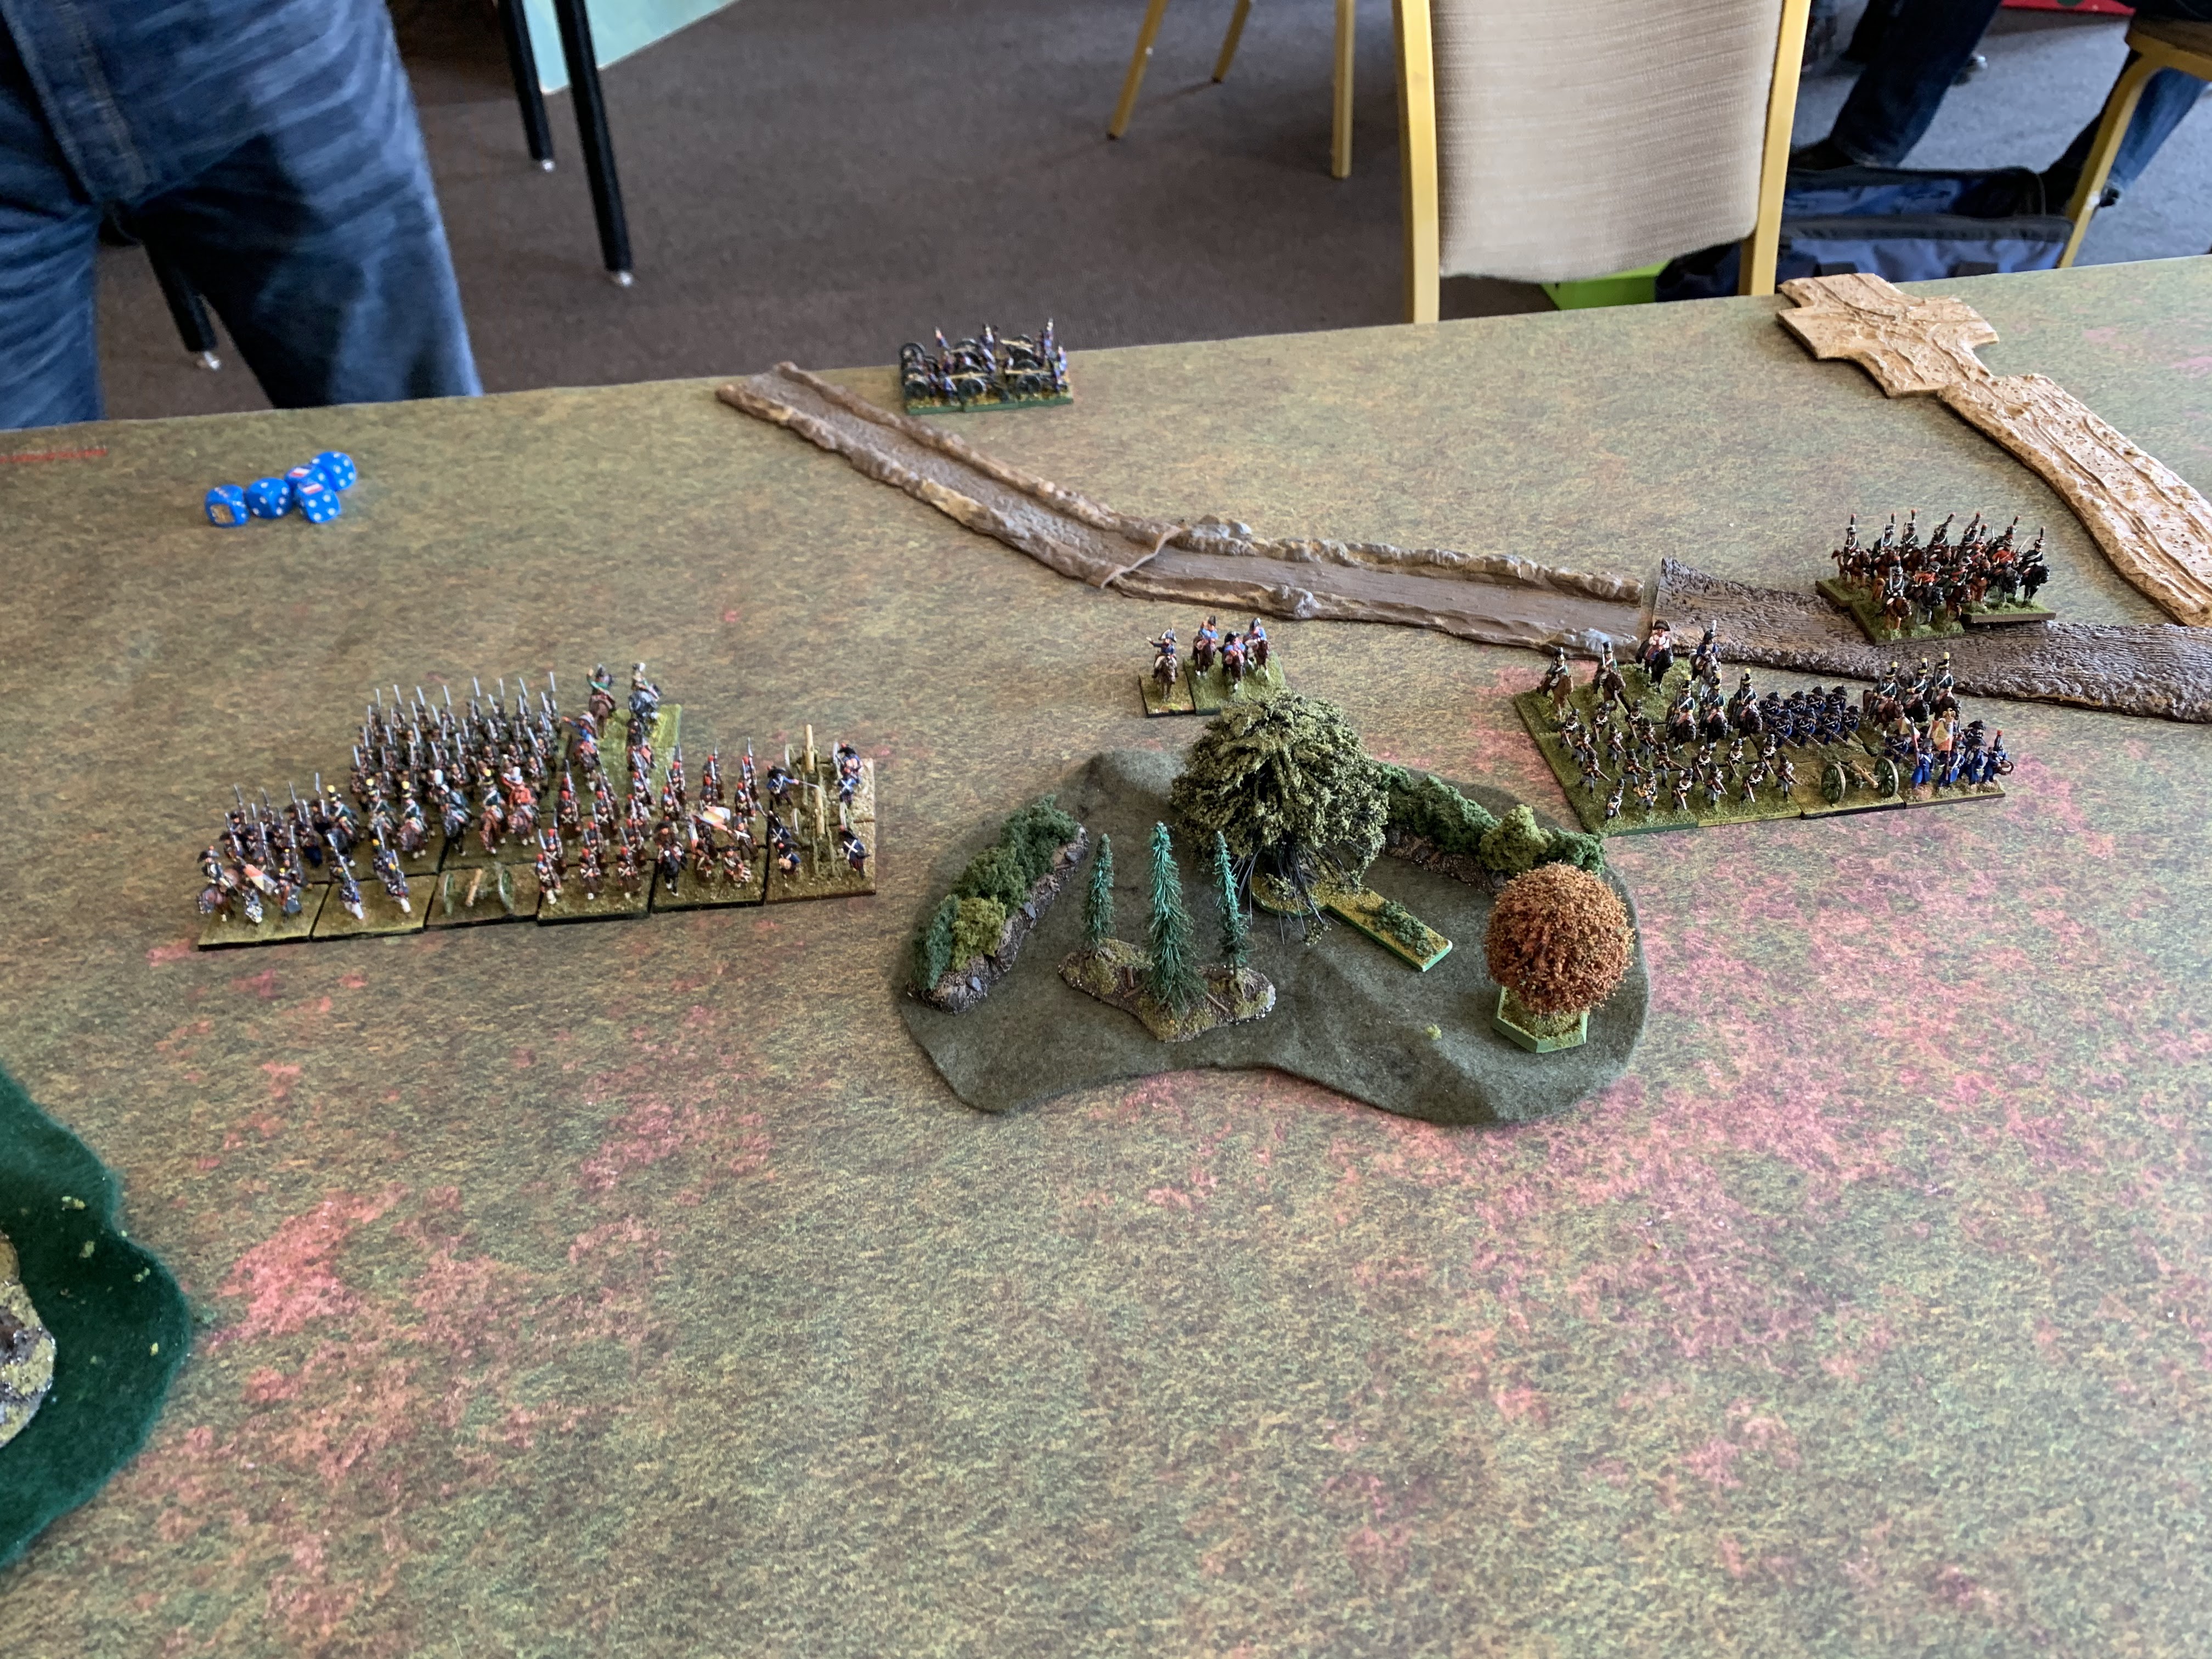
The French vanguard deploys into line.
|
Seeing my army laid out for them, the French clearly decided to attack my centre. They had to go around the forest to do it. On the left side is a heavy artillery brigade, a large infantry unit with cavalry and artillery battery, a small unit with the same support and a dismounted dragoon unit.
On the right is a light infantry brigade, a line infantry unit with artillery (and both with cavalry detachments) and a light cavalry unit.
The amount of cavalry the French had as attachments and in mixed divisions meant my skirmishers would be useless as medium range, and the heavy artillery was designed to destroy my redoubts!
 |
The French 1st Division
|
 |
| The Advance Guard division. |
|
|
|
|
 |
The Portuguese conscripts nervously watch the French Heavy Artillery to their north.
|
 |
As the French line advances, the British cavalry move forward, and the Highlander unit moves to cover the flank of the redoubt.
|
I had two divisions baring down on 3 infantry brigades. I needed to break up or slow down the left one.
 |
The Light Division reserve prepares to cross the river. A French cavalry unit guards their own flank.
|
I knew there were two more divisions of enemy troops coming, and I thought they might go for the town, so I didn't move out of it. Memories of losing the 95th Rifles to a charging cavalry unit made me cautious. I decided to use the Guerrillas across the river, and send the Highlander reserve brigade tro support the redoubt.
 |
The Allied cavalry division watches the advancing French.
|
 |
The 1st Division moves to it's firing positions.
|
 |
The two French divisions prepare to attack the line. The Heavy Artillery unit deploys and prepares to fire on the redoubt.
|
The French were clearly aiming for my left flank and the conscript unit inside the western redoubt. Their cavalry on the right hang back to cover their flank. The heavy artillery spent the entire game trying to ploy forward and failing every time.
 |
The allied cavalry splits up. The IMPETUOUS HUSSARS move to the left to perhaps get behind the French line. The heavy Dragoons and Portuguese Dragoons prepare to cover the flank.
|
I was thinking I MIGHT be able to get the Hussar's through the forest and headed to cut his Line of Communication. It forced his infantry to go into square and slowed down his attack.
 |
The French infantry move to attack the ridge line while the heavy artillery bombards the western redoubt.
|
I think he needed to wait for reinforcements here- he had 2 small units facing two large ones of mine.
 |
The Spanish Irregulars cross the river.
|
This was also maybe to get nearer his Line of Communication. The irregulars can move backward as fast as they go forward, so could always come back if needed.
 |
The Heavy Artillery rattles the Portuguese Conscripts.
|
 |
The French Vanguard advances closer, covered by artillery and cavalry.
|
The enemy attack that was so powerful is breaking up into small advances. Neither side has the strength to push an attack.
 |
The first wave of French reserves arrive down the main highway. Two infantry units and another cavalry unit.
|
I needed to see where these guys would go before committing anything. I guessed they were headed for the other redoubt.
 |
French artillery fire and skirmishers fail to cause many causalities but do prevent the British infantry from moving their artillery on top of the ridge line.
|
I was getting more disrupted, but I was VERY lucky with the conscripts- needing a 5+ and being forced to re-roll 6's they held on! Also I'd moved by Portuguese Dragoons into a position to hit his vanguard unit in the flank. I don't know why his other unit to the top left didn't advance faster.
 |
The IMPETUOUS BRITISH HUSSARS move to try and get behind the French lines, forcing their flank guard to form square and cease their advance.
|
This may be why. He's been forced to put a flank into square, and I could in theory hit the large unit IN the flank with the Hussar's.
 |
With their flank slowed down to form square, the mass French advance is breaking up. The heavy artillery fire is failing to damage the redoubt.
|
I got very luck with my morale rolls here, but he was making his too.
 |
The French reserves force the Spanish irregulars to move back to the safe side of the river.
|
I thought at this point they were surly going for the town. With a 2nd division still to arrive they might have had the strength to do it.
 |
The British skirmishers disrupts down the French advance.
|
I did manage to get enough hits in to disrupt his centre. Two large tooled up British Infantry units on a ridge line should do that.
 |
The French light troops in turn disrupt the British line, while the heavy artillery continues to pound the redoubt.
|
Though he was doing the same damage to me. The redoubt and staying BEHIND the ridge line was what saved my army here. Otherwise the heavy artillery unit would have been blasting me away.
 |
The left flank attack is slowing down due to the presence of British cavalry, as the allied centre re-orders itself. .
|
I could have maybe charged with BOTH units of cavalry here- Light and Shock heavy might have been enough to either break the square OR pass through. However, he'd placed his square in a position so that my cavalry didn't have enough room TO hit another unit on the other side, and would have just bounced. I need to remember that tactic. I should have done it on my right flank later.
 |
The French reserves move down the highway towards the second redoubt while the Light Division's Highlander unit moves to support it.
|
He redirected his reserves to attack the redoubt. I had my Highlander unit there, so it would have been a tough attack to succeeded in. And my Light infantry could move into the river and do some damage from a flank, though not too much.
 |
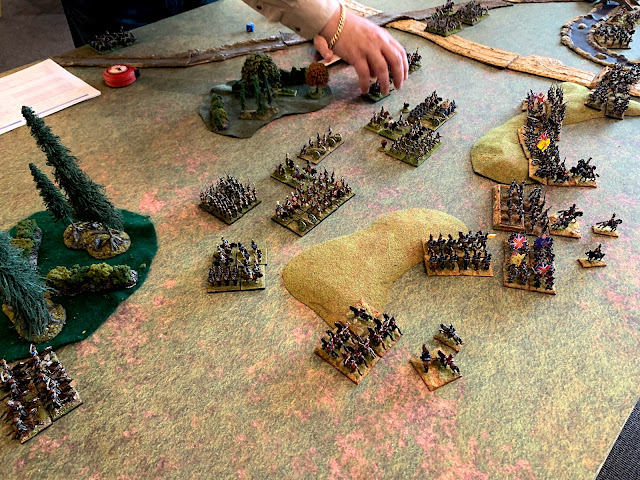
A heavy French Cavalry division arrives as reinforcements while the French left infantry is stuck in square but is starting to climb the left ridge.
|
His reinforcements arrived and it was two heavy cavalry units. Probably an equal fight to my British cavalry, so long as his infantry in square didn't cause any issues to them. His large unit is still being very hesitant to advance and can't move faster than it's flank guard in square.
 |
The French reserve division moves to attack the main defence line.
|
He was now moving away from the town and towards a position to hit my ridge line unit.
 |
PORTUGUESE DRAGOONS! PREPARE TO CHARGE!
|
I didn't NEED to charge my Portuguese Dragoons, but I thought now or never.
 |
CHARGE!!!!!!!!!!!!!!!!!!!!!!!!!!!!!!!!!!!!!
|
They had to pass in front of the artillery who were able to support the infantry, who DID manage to form square, but still were wavering by the end of it.
 |
RETREAT!!!!!!!!!!!!!!!! Despite wavering the French brigade, the Portuguese Dragoons are forced back and rout.
|
I'm not sure what happened, but my Dragoons routed, I think because of having to cross in front of the artillery. I was lucky it didn't impact the rest of my army.
 |
HUZZAH!!!!!! FOR KING AND COUNTRY! The British Infantry charge down the hill at the wavering French infantry.
|
It DID mean my infantry were now able to charge over and down the hill towards his wavering unit!
 |
ROUTED! The attack destroys the French line! Several units nearby are also disrupted by this event, but do not break themselves.
|
They unsurprisingly lose that fight, though this time his centre didn't collapse when it lost that critical fight, it did disorder the other units there. I could probably have charged his other infantry unit and rolled up his line.
 |
The French centre is holding while the reserves move to attack the ridge line. French cavalry on the left hold off the light division from advancing into their flank.
|
I think I could win the fight on the right - my Portuguese in the redoubt, the Highlanders and the large British unit next to them. His centre was under pressure and my left was still holding him off and would be fighting from a redoubt and another Highlander unit. His reinforcement heavy cavalry will still 2 turns away and stuck behind his infantry, though they would be able to defeat my Hussar unit.
My Light Division was not really doing much. I should have moved the Rifle's into square and just moved towards the enemy flank. His cavalry wouldn't have been able to do much about that and it would have caused damage to his infantry attacking my centre.
 |
The British left flank cavalry force the French right into square. French fire fails to unnerve the British Dragoons.
|
I was lucky my Dragoons weren't getting hit by the infantry in square, I should have moved them back a bit, but that might have had the same impact. They were stopping the large infantry unit from advancing past the square guarding their flank.
I should have probably charged the rear unit as it was an irregular unit and would have been easy meat.
 |
As night falls, the French attack is stalled.
|
We'd run out of time at this point, but I think I had the advantage. His vanguard division was disrupted, and my right side was facing better odds than before. His Heavy Cavalry had arrived too late.
 |
The left is stuck in square, the centre is disordered and the right has taken too long to get into position and is still facing fresh troops. The battle is OVER. THE LINE HAS BEEN HELD.
|
It's a narrow 1 point victory, and both armies have only lost 1 brigade each, but I'd say I won the battle. The line held.
 |
The remains of the Lines of Torres Vedras in modern times. Napoleon never broke through.
|
 |
Final Score 13-12.
|
|
 |
| Copy of the French army list. |
|
|


No comments:
Post a Comment
Thank you for the comment on my blog! May your dice never desert you and your tactical abilities be as good as your posting is! Never stop posting.